
Learning how to make Side by side photos is very useful for your everyday use.
There are many reasons you might choose to make a side-by-side photo. It may be to compare yourself one year from now to see how your weight-loss journey is going. Or maybe you’re a blogger and want it to make product comparisons.
Whatever the reason there are many ways to create a side-by-side photo and it doesn’t matter whether you’re on PC, Android, or Apple IOS.
Fortunately, you also don’t need any premium editing software to make one yourself.
In this article, I’ll discuss how to make a side-by-side photo using some web-based photo editors and apps on your PC and smartphone.
How to make a side by side photo using BunnyPic
The best way to create a side-by-side photo is by using photo editing software.
Photo editing software will give you full control and flexibility to make your side-by-side photos the way you want.
However, when we speak of photo editing software we think of Photoshop. Unfortunately, Photoshop is expensive and has a huge learning curve making it difficult for beginners.
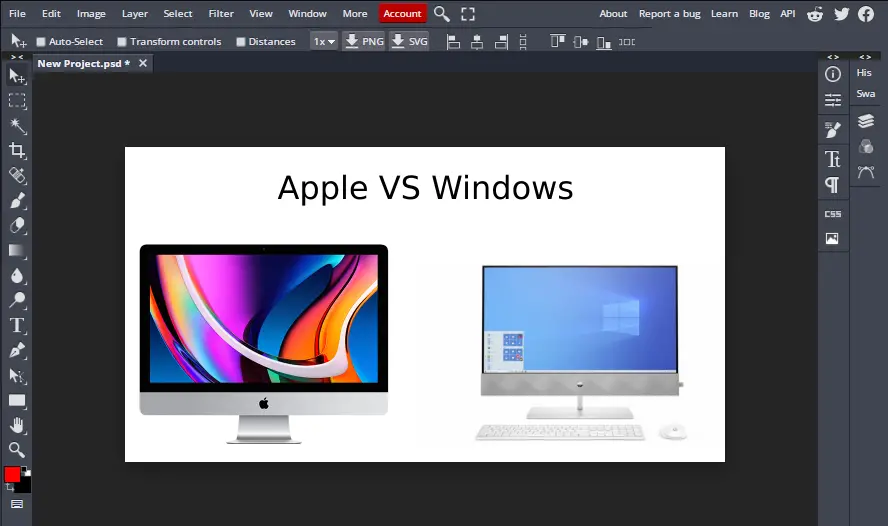
Fortunately, you can use our tool, BunnyPic. BunnyPic is our online Photoshop tool that is free-to-use and beginner-friendly. It requires no sign-up and has almost all the features of Photoshop.
To create a side by side photo in BunnyPic:
- Go to BunnyPic and click on New Project.
- Create a horizontal document with the ratio 16:9 (Landscape) or around 1280 x 720px (Standard HD.)
- Now, go to File > Open and open the two images you want to put side by side.
- Drag and place both the images to the main document tab.
- Now adjust the image size using Transform controls and place them side by side.
- When you’re happy with the result go to File > Export As > PNG or JPG.
How to make a side by side photo using Photo Joiner
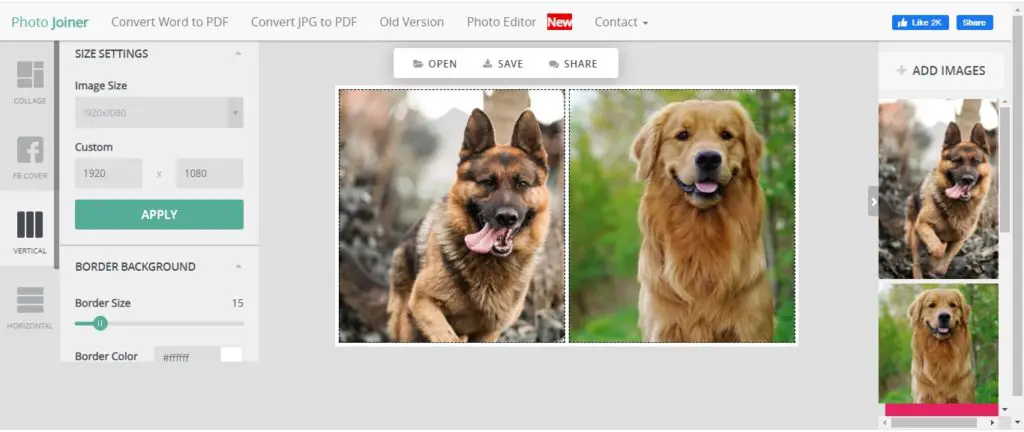
Photo Joiner is a great free web-based tool to easily make side-by-side images. It’s beginner-friendly, easy-to-use, and gives instant results without you having to do much work.
The main downside to using Photo Joiner is that it doesn’t give you the ability to scale your images. This means some of your images might get cut when inserting it into Photo Joiner.
Follow these instructions to create a side by side photo in Photo Joiner:
- Go to Photo Joiner and from the top click on Join Photos.
- Now, from the left side choose how many photos you want to compare and a template.
- Now on the right there will be an Add Images button click it to add your images.
- After selecting and adding your images drag them on to the canvas in the boxes.
- If you want to add borders around the pictures, on the left increase the Border Size under BORDER BACKGROUND.
- When you’re finished press SAVE and then download your image.
If you are working on images with varying sizes it would be best to use a photo editing tool such as BunnyPic.
How to make a side by side photo on Apple IOS
Creating side-by-side photos is extremely easy on mobile due to several helpful apps.
To make a side by side photo on Apple IOS:
- Go to the App store
- Search “PicMerger” and download it.
- Open the app and add both the photos you want to place side by side.
- Select or tap both the photos and press Next.
- Now, from the options, select Horizontal.
- This will automatically create a side by side photo. Preview it and click Confirm
- Finally, tap Save.
After following the steps correctly you should see your side-by-side photo in your camera roll.
How to make a side by side photo on Android
There are 2 ways to make a side-by-side photo on Android; Google Photos and an app called Pic Stitch.
Using Google Photos to make side by side photos on Android
Google Photos is usually added by default to most Android smartphones but if you don’t download it from the Play Store. Once downloaded follow the steps below:
- Allow Google Photos access to your photo gallery to make your pics appear.
- Now, select the two photos you want to place side by side.
- With both of them selected click on the + icon.
- Choose Collage to automatically place the photos side by side.
- Now, make adjustments if you want and your image will be added to your gallery.
With Google Photos you can create side-by-side photos on both PC and mobile following the same process. You can also sync your google account which will allow you to share your files quicker across multiple devices.
Using an app to make side by side photos on Android
Pic Stitch is a great free app available on Android which allows you to easily create side-by-side photos.
To start using Pic Stitch to create side by side photos follow these steps:
- Go to the Play Store.
- Search “Pic Stitch” and download it.
- Open the app and choose the layout you want.
- After choosing your layout click on one of the boxes to add your images.
- Select the images you want to place side by side and click the tick icon.
- If the images are not showing correctly click on Aspect to change the aspect ratio.
- If you want to resize a box to show more of the image click on Resize and drag the box.
- Once you’re happy with the result press Export and save it.
Conclusion
Due to some free online photo editors like BunnyPic and mobile apps, it is very easy to make side-by-side photos. You can use your smartphone Android or IOS or your PC to create side-by-side photos for your blog or social media.
It is best to use BunnyPic as it allows you to create your side-by-side photo and gives you full control and flexibility over it.
If you want to learn how to create professional-looking photo collages check out our article on How to Make a Photo Collage.