

Have you ever wondered what you would look like with different colored hair? You might be tempted to reach out for that bottle of bleach and dye your hair but what if there is a way to first preview what you would look like without messing with your hair.
In this tutorial, we’re going to look at how to color your hair online. By coloring the hair of your photo online you’ll be able to get an idea of how’d you look with different-colored hair. Fortunately, it’s quite easy to do and would be greatly worth it.
Not to mention that being able to change the hair color of a photo is a great skill to have for photo retouching and special effects. If you plan on doing photo retouching as a career or hobby you would want to learn this.
How to Change Hair Color Online with BunnyPic.
When we think of photo retouching we instantly think of Photoshop. Photoshop is no doubt a powerful tool to edit your photos but it’s also pretty expensive. If you are just a student, doing this as a hobby or just want to see what you would look like with different colored hair; buying expensive Photoshop software might not be worth it.
Fortunately, you can change the hair color of your photos with our free Photoshop tool, BunnyPic. BunnyPic is an online photo editor that doesn’t require any installation and is totally free to use. It is beginner-friendly and offers you almost all the tools of Photoshop to edit or enhance your photos.
For this photo editing project, we’ll be using BunnyPic to color the hair color of our photos into colors like black, white, and blonde. We’ll even learn to add some streaks to our hair to give it more appeal.
1. Setting up the image
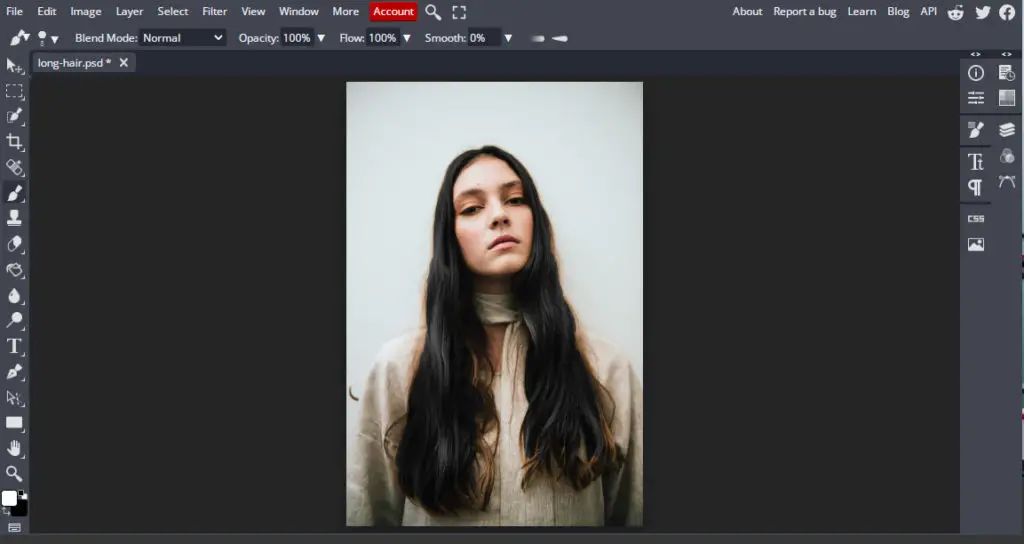
To start editing we need to add our image into our photo editor. There are some things to keep in mind when choosing a picture to edit the hair color of. Coloring the hair of your subject in BunnyPic is a difficult task so we need to make sure we have a good picture that would make the whole process easier.
Here are some points to keep in mind when choosing a picture:
- Make sure the hair of the subject isn’t too rough. Rough hair is harder to work with as it’s difficult to determine the edges of the hair. Because of this, it would be almost impossible to have a good selection of the hair.
- Have a contrasting background from the subject’s hair. The background should be a different color than the hair color of the subject. If the hair and the background blend together it would be difficult to make an accurate selection.
- Have good lighting for your photo. Having good lighting in your photo would ensure better results as it would be easier to select the hair. It would also lead to a more realistic hair color as there won’t be too many shadows and highlights to deal with.
Once you have your image downloaded and ready to edit, you can now open it up in BunnyPic.
- Go to the BunnyPic Editor
- Click on Open from Computer
- Select the Image you want to change the hair color of.
Now, we’ll get on to the editing part.
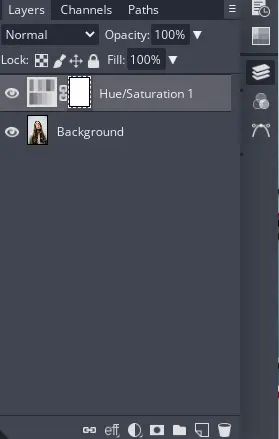
2. Add Hue/Saturation Adjustment Layer
The adjustment layers in BunnyPic are a great way to improve your photography. To color the hair of our subject we would have to add a hue/saturation adjustment layer on top of it.
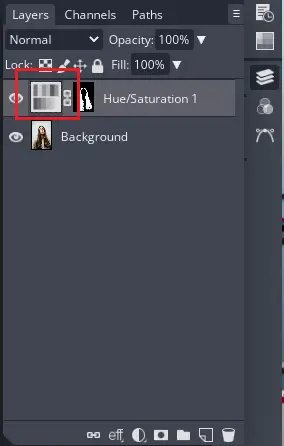
- Open the Layers Panel from the right toolbar (indicated with a stacked layers icon).
- From the bottom options click the adjustment layers (indicated with a half-white half-black circle).
- From the options select Hue/Saturation. This will add a Hue/Saturation adjustment layer and open a new properties window.
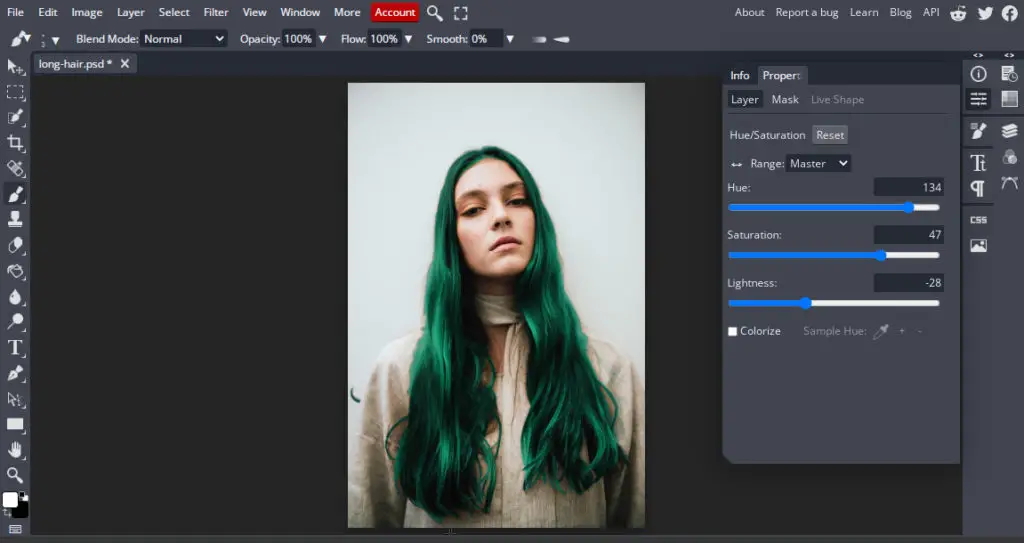
Now that we have our adjustment layer in place you can apply any color you like to it. To do this:
- From the properties click on Colorize this will apply the color to your image.
- Now, adjust the sliders as you like. Once you get the color close the properties panel by clicking on the properties icon (indicated with sliders icon in the right).
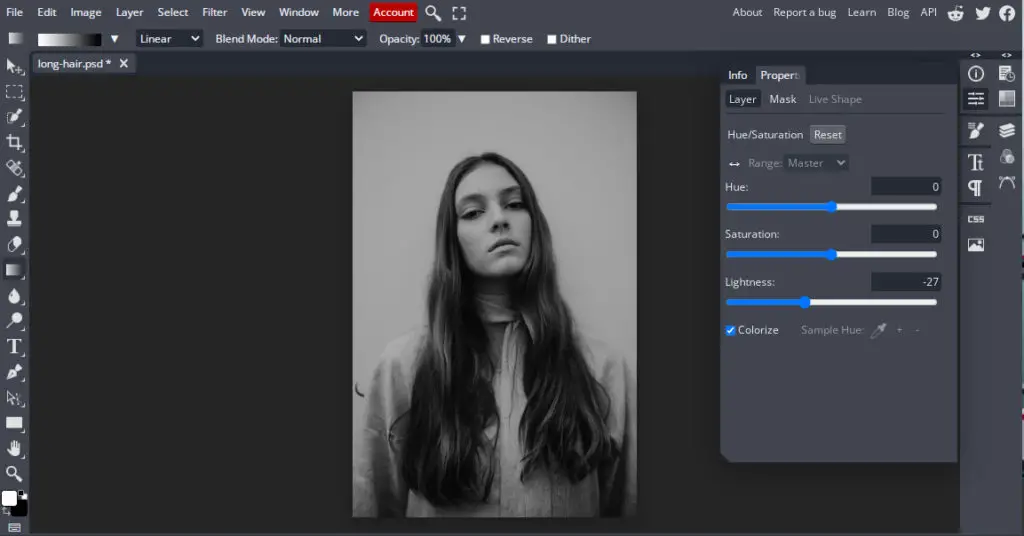
Once you have completed the above steps successfully your image would be the color you want. However, the whole subject is in our color and we only want to color the hair. To fix this we’ll hide the color and proceed to the next step.
In order to do this:
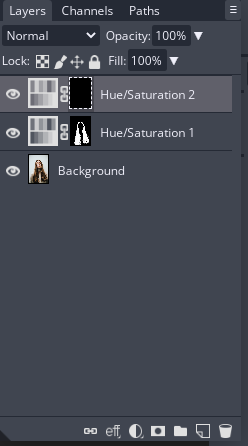
- Open up the Layers Panel and select the Mask on the right side of the Hue/Saturation Layer.
- Once selected, from the right toolbar, click and hold the gradient tool to select the Paint Bucket tool.

- With the Paint Bucket tool active switch your foreground color from white to black.
- The default background color is black so switching it to the foreground color would cover our hue/saturation layer. Once we apply it to the mask you can see our color effect is gone but the layer is still there.

So, next, we’ll have to paint over our subject’s hair to color the hair our set color.
3. Color the Hair with Paint Brush Tool
By adding the Hue/Saturation adjustment layer from the above step we have set the color of our hair. But, it’s not visible so now we have to paint over our hair to add color to it.
- From the left toolbar select the Paint Brush tool or press B on your keyboard.
- Now, we have to switch our foreground color back to white and select the Hue/Saturation Layer Mask. Our layer mask color is black so drawing on top of it with white would start to show the color underneath.
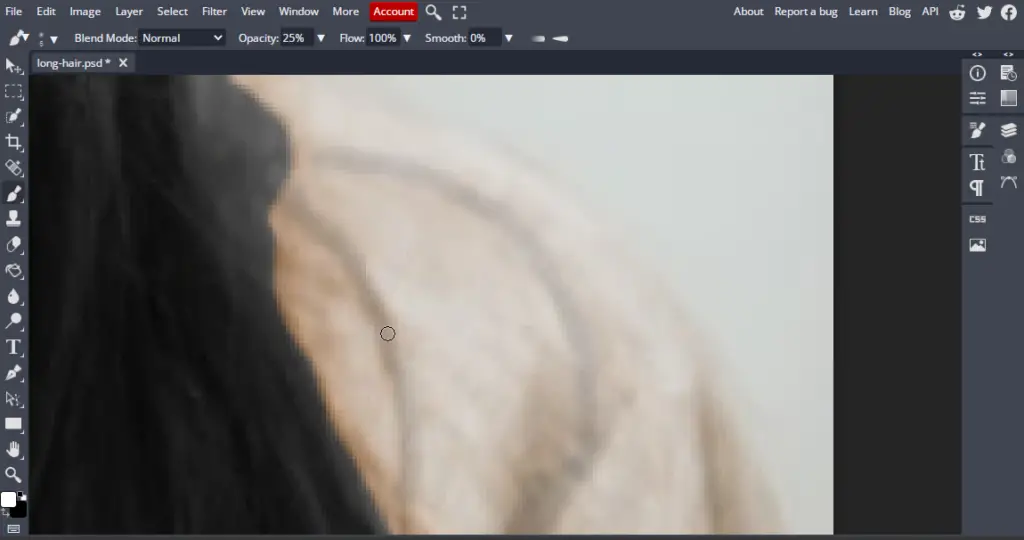
- With your Paint Brush active start drawing on top of the hair to color it. You can use the options from the top toolbar to adjust the size, opacity and flow of your brush. However, a much more efficient way to do this by using the hotkeys. By pressing the left and right brackets on your keyboard you can increase or decrease the size of your brush. To make the edges of the brush of the softer hold Shift and press the Left bracket key and to make the edges harder hold Shift and press the Right bracket key.
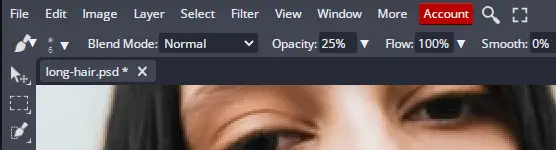
- Naturally, there would be some places where it would be harder to paint. These can be flyaway hairs or loose strands. To paint over these lower the opacity of the brush to somewhere around 25 and paint over them. This will give them a nice soft effect without making it look unrealistic.
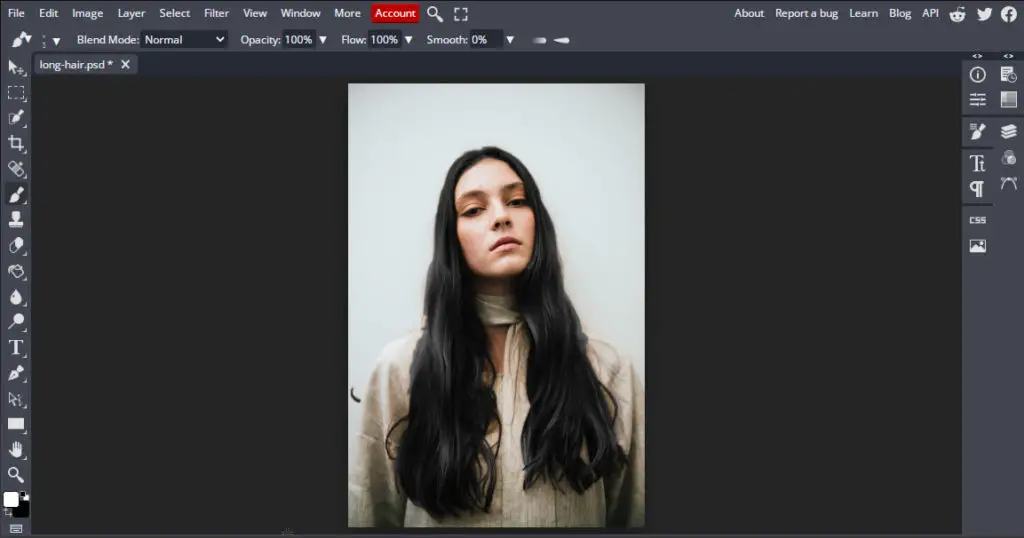
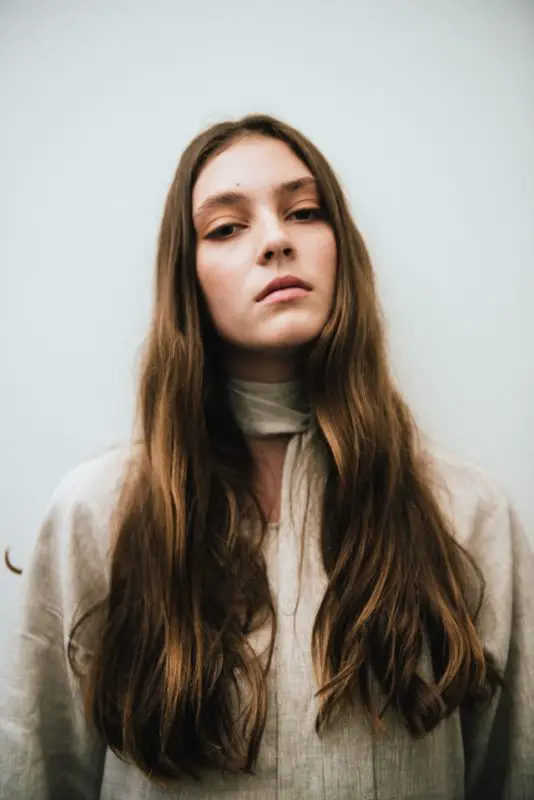
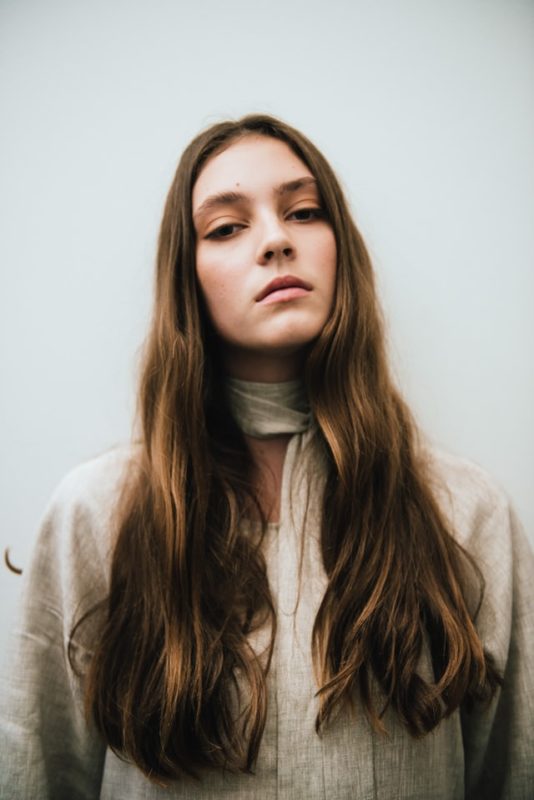
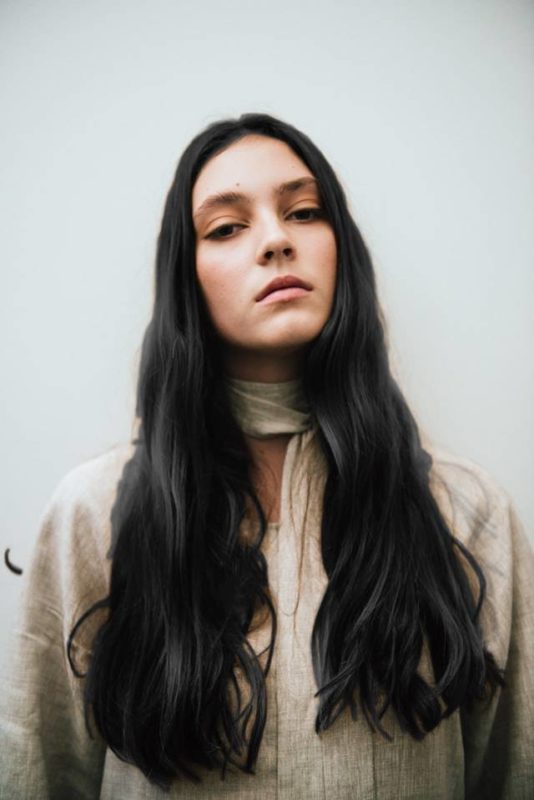
Congratulations! We have changed the hair color of our subject from dark brown to black. Here’s a comparison of the original and our final image:
Now, all that’s left to do is save our image.
4. Save Your Image
We have successfully colored the hair of our subject so all we have to do now is save it. BunnyPic gives you lots of export options to save your image so you can choose the one that would fit your requirement.
To save your image, go to File > Export As > PNG or JPG.
How to Change the Hair to a Different Color
It might be that you want to check out different hair colors on your photo to see and compare them. Thankfully, you don’t have to go through the whole process of editing and changing the color of your hair above.
Since you already have a Hue/saturation adjustment layer in place, go to the Layers Panel and double click on your Adjustment layer to open the properties panel. From the properties panel, adjust the sliders to the new color you want to apply to the hair.
Another cool thing you can do with adjustment layers is to add streaks to your hair.
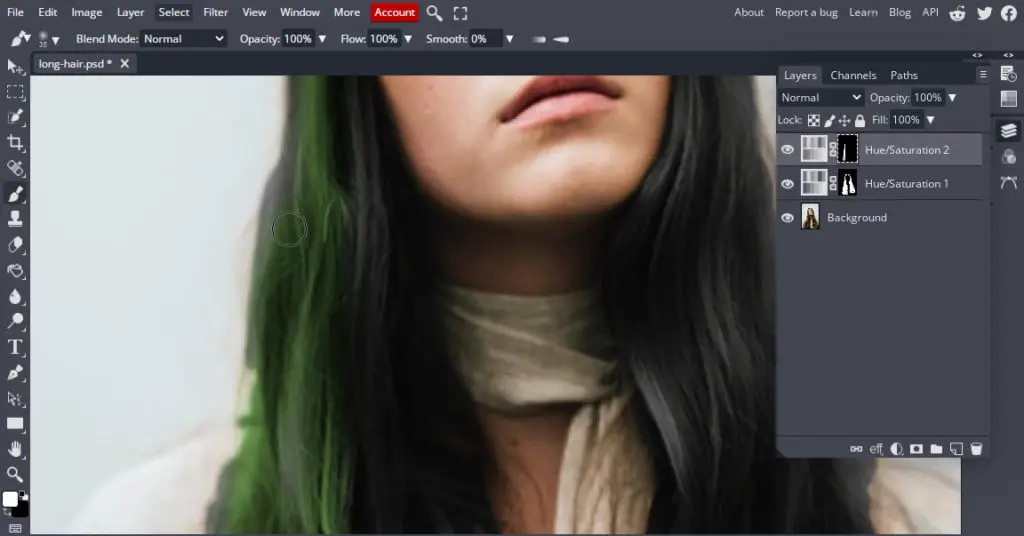
How to Add Streaks to Hair
Even though many of us might have wondered what we look like with different colored hair; many people also just want a subtle effect on their hair. That subtle color is called a streak. Having different colored streaks in hair is a common fashion and they also look pretty good.
To see what you would like with streaks in your hair you can use BunnyPic to edit your image. To do this I’ll use our previous example and apply green-colored streaks to her hair.
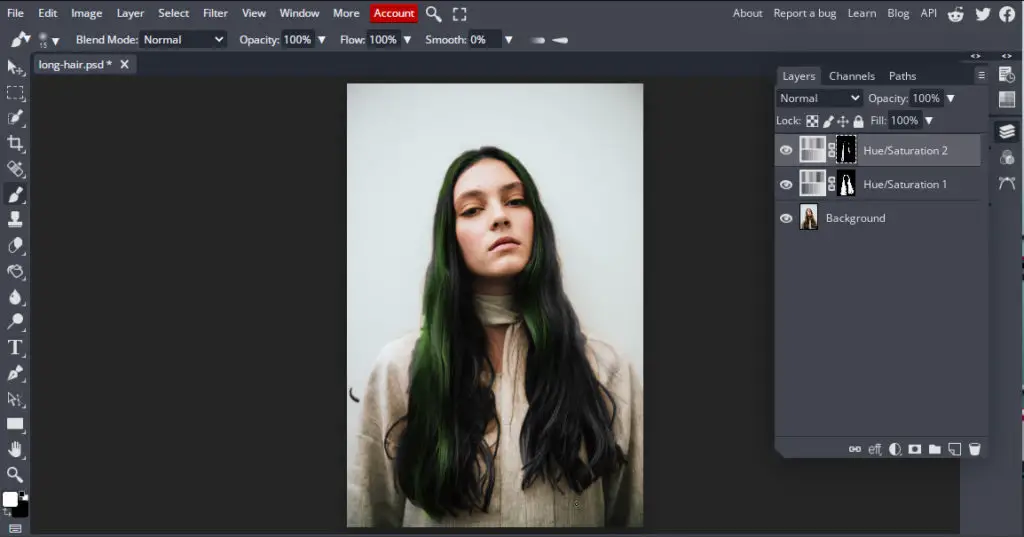
- Open the Layers Panel and add another Hue/Saturation Layer on top of the previous layer. This will be our second color that would lay on top of our first color.
- Next, from the properties panel, adjust the sliders to the color you want your streaks to be. I’ve adjusted the layer to be a bright green color.
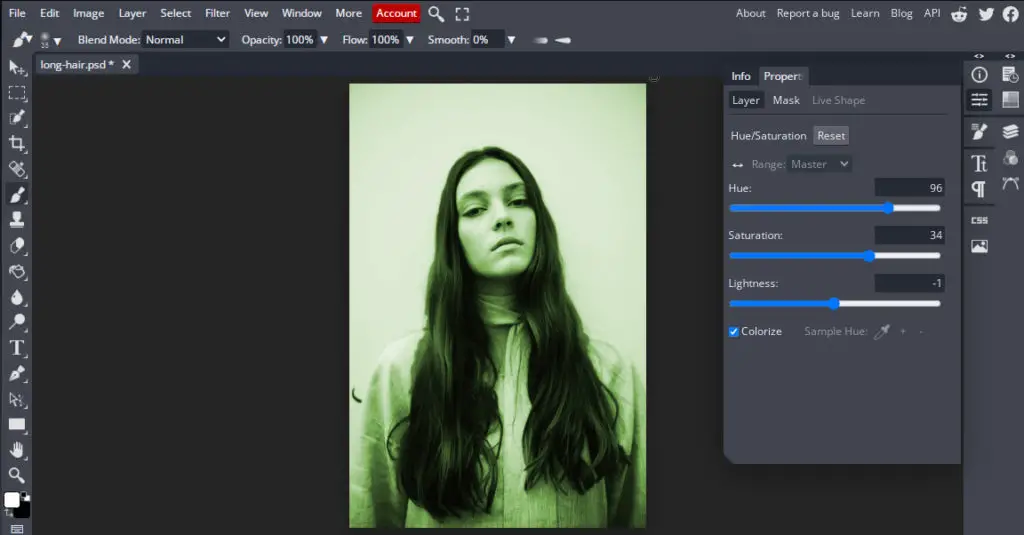
- Now, just like before, paint the mask of this new adjustment layer black by switching the foreground color to black and filling it with the Paint Bucket tool.
- Once done, switch the foreground color back to white and select the Paint Brush tool or press B on your keyboard.
- With the Paint Brush tool selected paint over the parts of the hair you want to add the colored streaks.
Once you’re happy with the effect save your image.