
You look at your computer and phone everyday and everyday you’re greeted with the same boring default wallpaper. Since you spend most of your day in front of a screen, be it for work or anything else, why not make it look the way you want it?
Having a cool looking background is great but what if you could create your own photo collage wallpaper? A collection of your best and most memorable clicks in one frame, on your screen at all times. Well, that’s totally possible with BunnyPic!
BunnyPic is a free web photo editing software that enables you to create stunning graphics and photo collages. With it you have access to hundreds of different tools and features that you can use to create your very own collage wallpaper.
In this guide we’ll look at how to create a collage wallpaper online and gather ideas and inspiration to capture our own style. Let’s dive into it!
How to Make a Collage Wallpaper Online with BunnyPic
Making a collage wallpaper can brighten up your laptop’s or smartphone’s home screen. Creating one with BunnyPic is easy. Here’s a step by step guide on making a collage wallpaper online with BunnyPic.
1. Get Your Pictures
You may have photos with you saved on your phone. But, you need to transfer them on your computer before starting. Before we go into the process of transferring your photos on your computer we first have to make sure to choose photos that make sense.
When choosing which photos to include in your collage, you need to be selective. You can’t expect to include 20+ photos in a collage and hope it looks good. Rather you should select the ones that you think will look best and flow together.
Here are some best practices for selecting photos for a collage wallpaper:
- Make sure they are high quality and not blurry, pixelated or too small
- Use photos sparingly by choosing more than 2 but less than 10
- Select photos with a consistent theme like a long-drive or a beach day
- Add a mix of big and small images to add some variety into the collage
How to Transfer Photos from Your Phone to a Computer
To transfer photos from your phone to your computer you need to have a USB cable. What USB cable you need would depend on the type of phone you have. Look at the phone’s charging port and see what kind of cable it supports (USB 2.0, Micro, Type-C etc.)
With your USB cable in hand, connect the phone with the computer. Make sure your phone is unlocked otherwise the PC would have a hard time finding the device.
Next open the photos app on your PC, choose Import and select the photos you want to import. If you’re on Windows you would have to click on Import > from USB device and then select the photos you want to import.
Consequently, if you don’t have any photos of your own you can download stock photos for free. Stock photo sites like Unsplash and Pexels have thousands of free high quality photos that you can use for your collage wallpaper.
Once you’ve gotten your photos on the computer you can start creating your collage wallpaper. So, let’s move forward and look at how to create one.
2. Create a New Document
.Before creating a document we need to see what our screen size is. This will helps us make sure that our collage wallpaper will look the way we designed it. If you’re on desktop you can find out your display resolution by going to the “Display” settings.
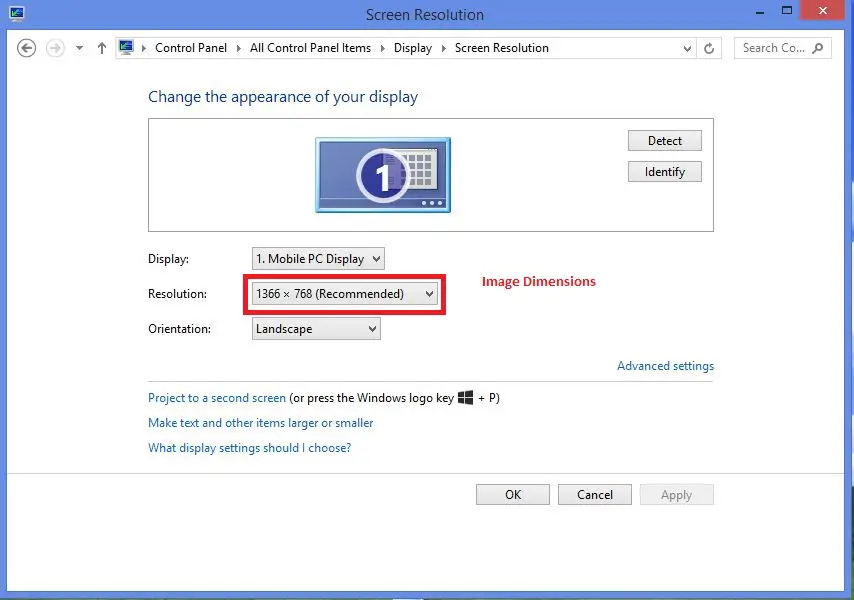
Go to the BunnyPic editor and click on New Project. From the new window, create a document that matches the resolution of your screen. You can check BunnyPic provides several templates for common screen sizes which you can find under the “Screen” tab. Search for your screen size and click Create.
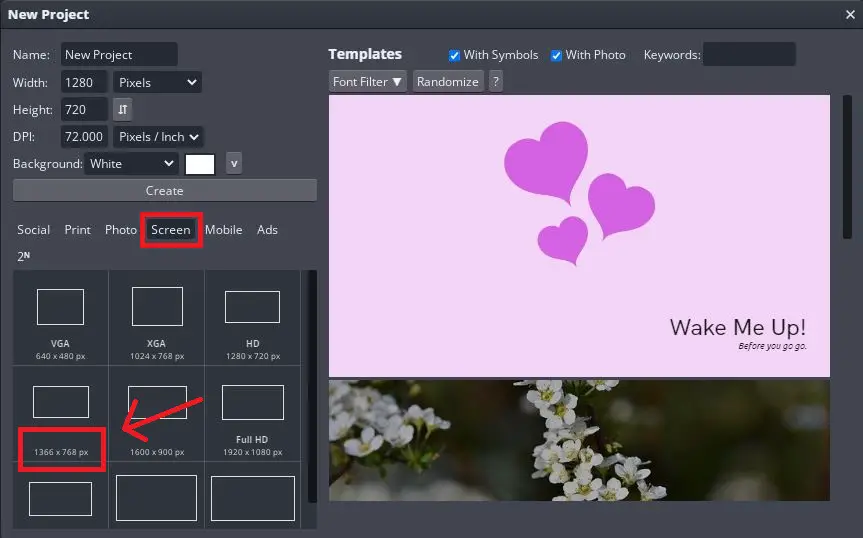
Similarly, if you’re designing a collage wallpaper for mobile you can check out the Mobile tab for common sizes on that device.
3. Upload Your Photos in the BunnyPic Editor
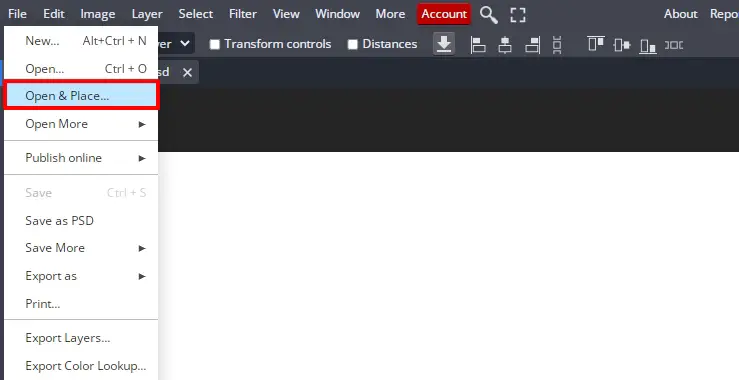
After your document is set up it’s time to add in your photos. Upload your photos by going to File > Open & Place and selecting all the images you want to add to the document. Alternatively, you can drag and drop your images altogether into the editor.
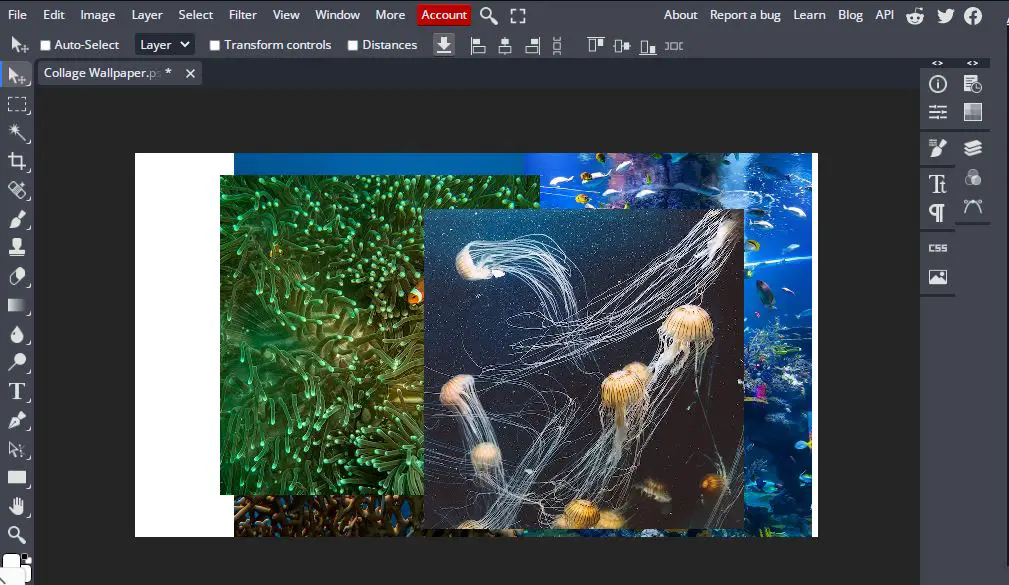
Now we have all our images loaded on the canvas but they’re all over the place, literally. I had sized my images before uploading them but some of your images might be too large for the page. To fix this select the Select tool (black cursor icon) from the left toolbar and click Transform Controls at the top.
Some anchors would appear around your image. Click and drag them to resize the image until it fits on the page.
4. Correctly Position Your Photos
You’ve got the images on the page but they’re still not in order. To make some sense out of it, we’ll roughly position them to get an idea of where we want to place our images. This will give the collage some shape and guide us a bit on how to position the images.
Don’t fixate on this step. You just need to place them in a way that you have an idea of where everything goes. This will help you see and crop the excess areas later.
5. Crop Extra Parts of Photos
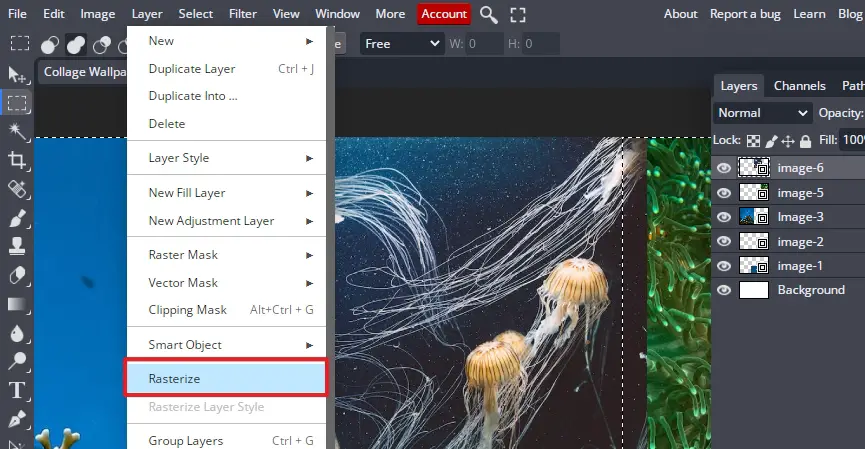
Our images are properly sized and placed together. Now we have to cut off the parts we don’t need to make the collage wallpaper look cleaner. Before cropping the images you need to rasterize them first. Do this by selecting the image layers and then navigating to Layer > Rasterize.
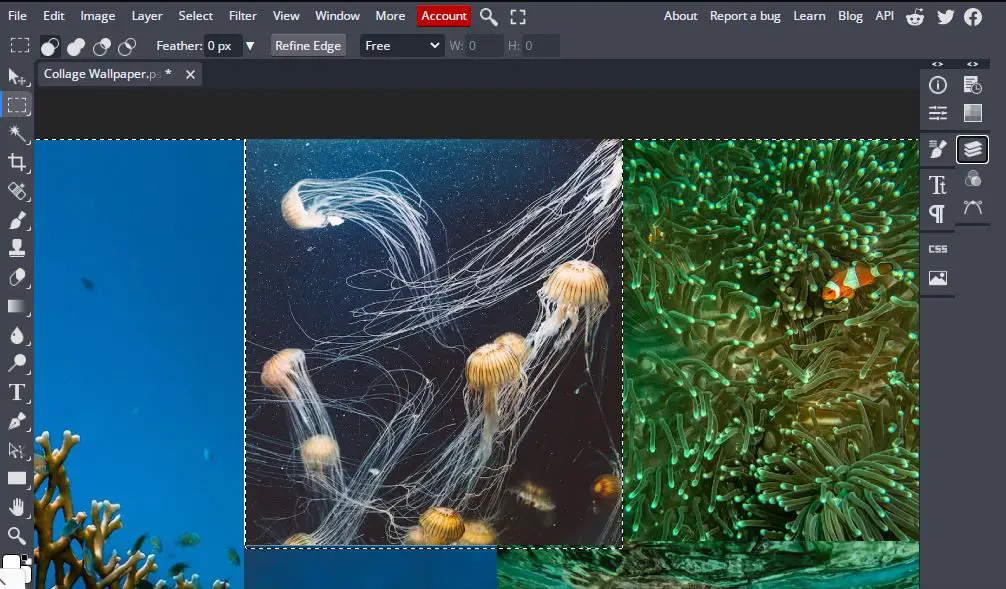
To start cropping your photos select the image using CTRL + clicking on the image you want to crop or by selecting it from the image layer under the Layers panel. With the image selected, grab the Marquee Select Tool from the left toolbar and only select the part of the image you want to keep.
With the selection active, press Shift + CTRL + I or go to Select > Inverse to invert the selection and select the extra area surrounding your image. Now just press Delete or Backspace on your keyboard to delete the excess part.
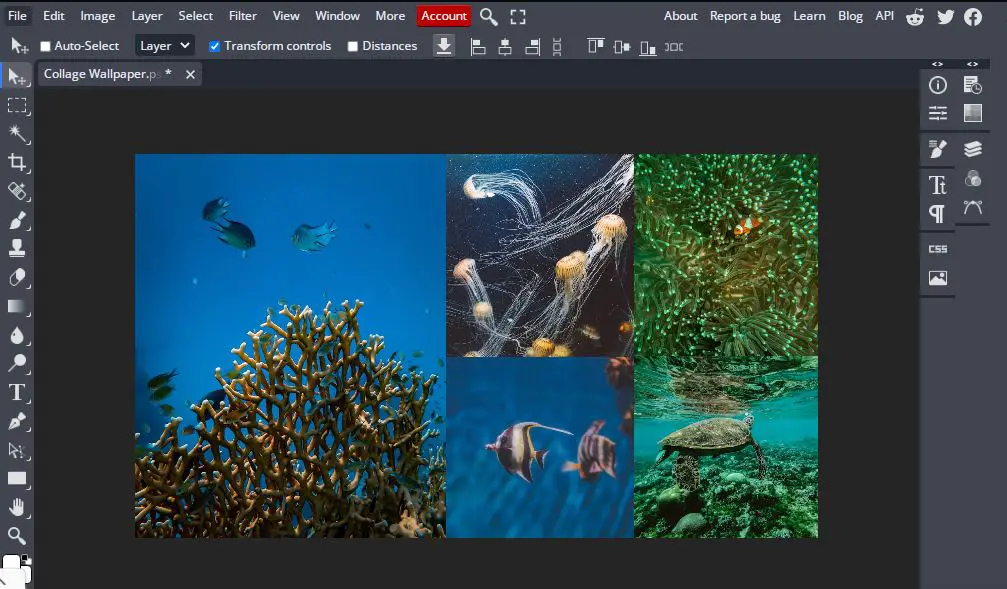
Do the same with all the other photos until your collage wallpaper is looking balanced.
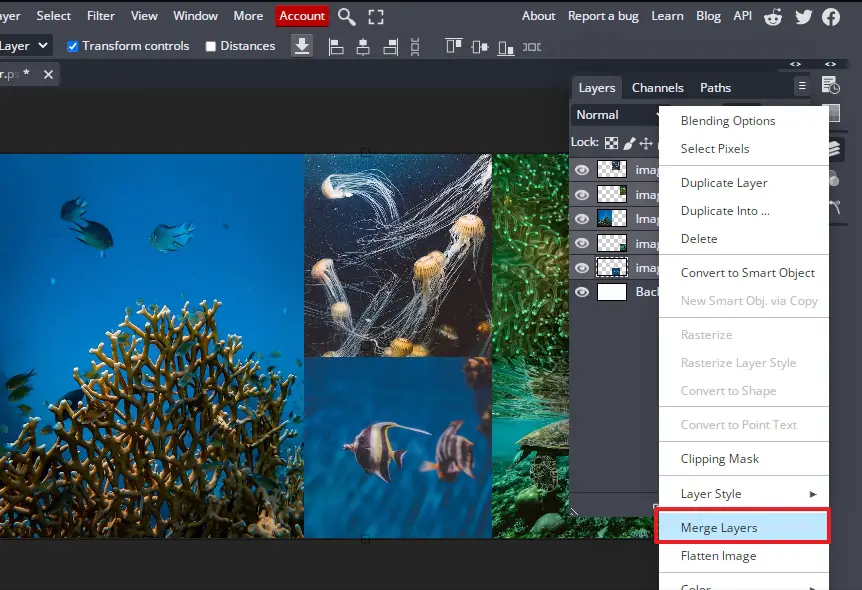
6. Merge Layers Together
Our collage wallpaper is looking great! Before we save it we need to merge the layers together so it becomes one complete image rather than a bunch of separate images grouped together. Merging the layers would blend the photos together seamlessly giving you a better effect when applied as a wallpaper.
To do this open the Layers Panel from the right (indicated by the stacked layers icon) and select all the images. With all the image layers selected right-click on the window and select Merge Layers.
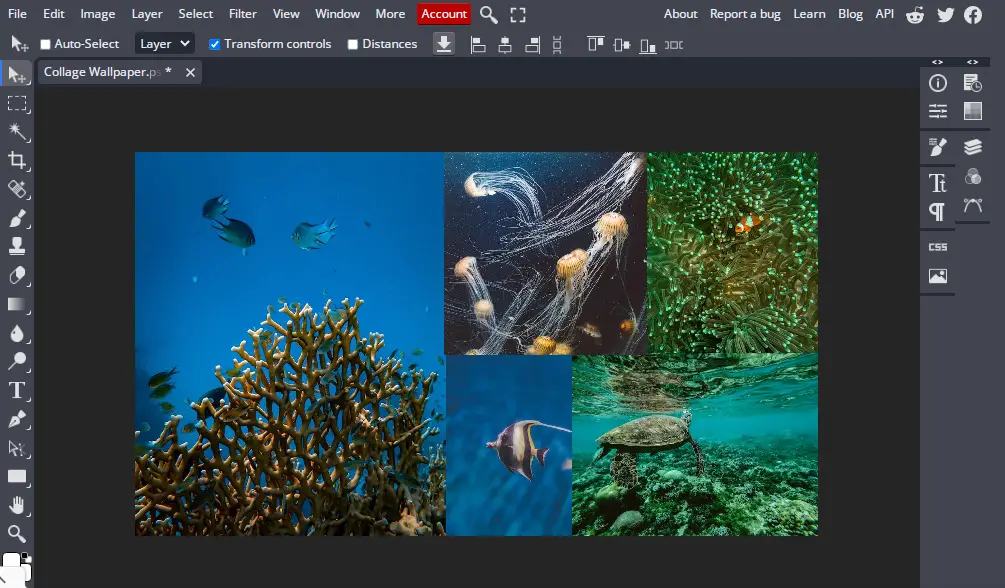
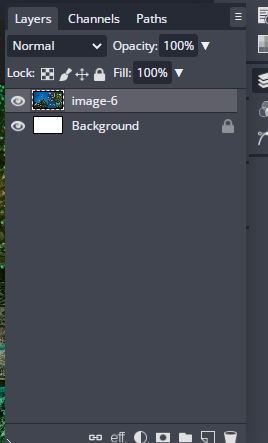
This will compress all our photos into one image layer like so:
7. Save & Export Your Collage Wallpaper
Now that we’ve completed all the steps, we need to save the image. To save your image go to File > Export As > PNG. You can choose JPG for a smaller file size but PNG will preserve the colors and keep your collage wallpaper looking vibrant.
Finally, apply your new collage wallpaper on your device:
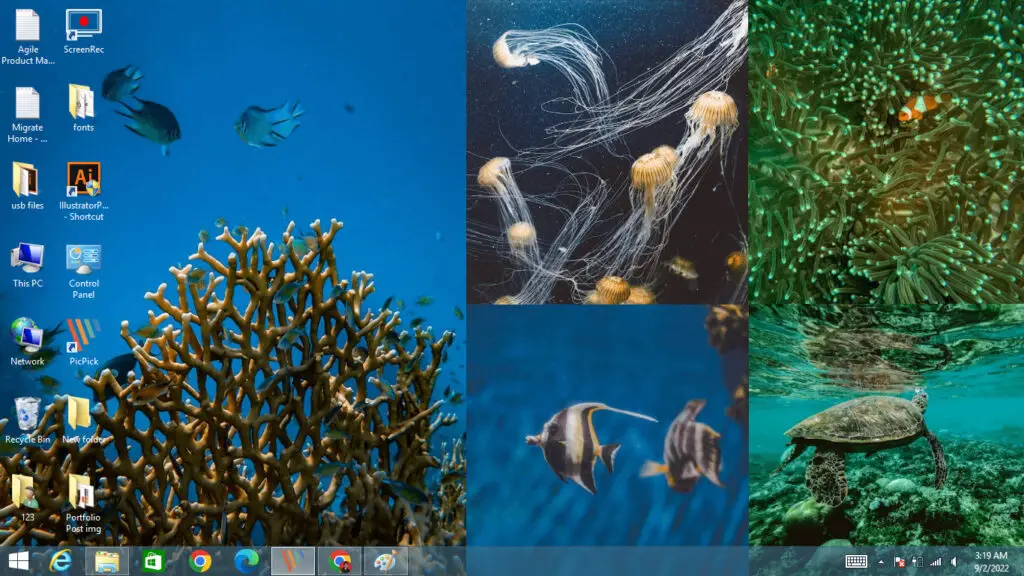
Not too bad if I do say so myself.