
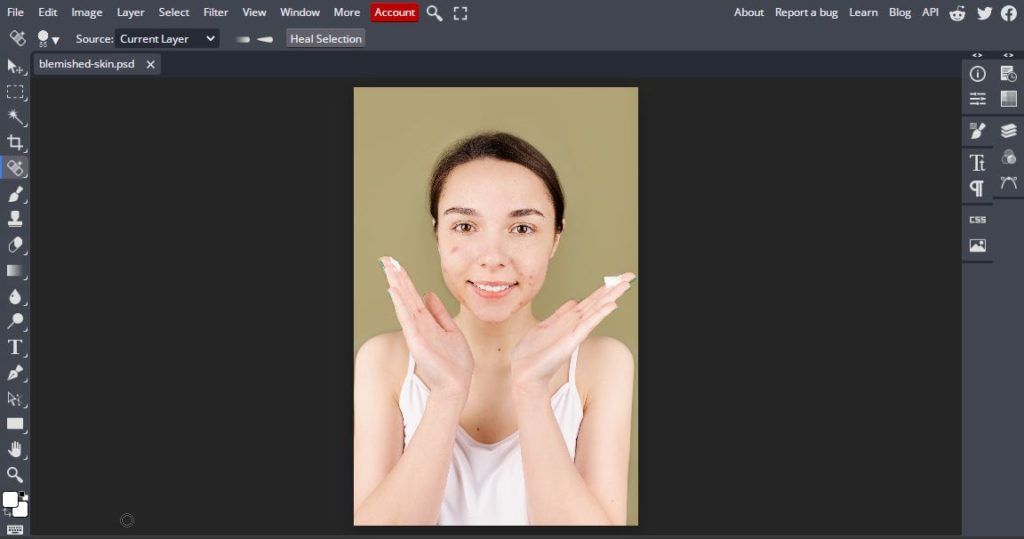
Skin damage and blemishes stopping you from taking the perfect photo? It can be upsetting to set your hair straight, spend hours choosing the best outfit and adjust the lighting just to discover that acne scars, blemishes and freckles are limiting you to looking your best self.
Getting flawless skin can require a lot of time and effort. Using a bunch of skin care products and establishing a skin care routine is not for everyone. But, there’s a way you can take some great portraits without all the excessive products.
With BunnyPic’s blemish remover photo editor online, you can remove skin blemishes in an instant. BunnyPic’s editor helps you get smooth and clear skin for your Social Media posts, selfies and portraits for free. In this article we’ll explore the spot healing brush tool and how to use it to remove blemishes from your photos online.
How to Remove Skin Blemishes in BunnyPic Online Photo Editor
BunnyPic is a free online photo editor. It has some noteworthy features that make it similar to the industry-standard Photoshop from Adobe. Thanks to it’s A.I. capabilities and content awareness, BunnyPic can help with image manipulation.
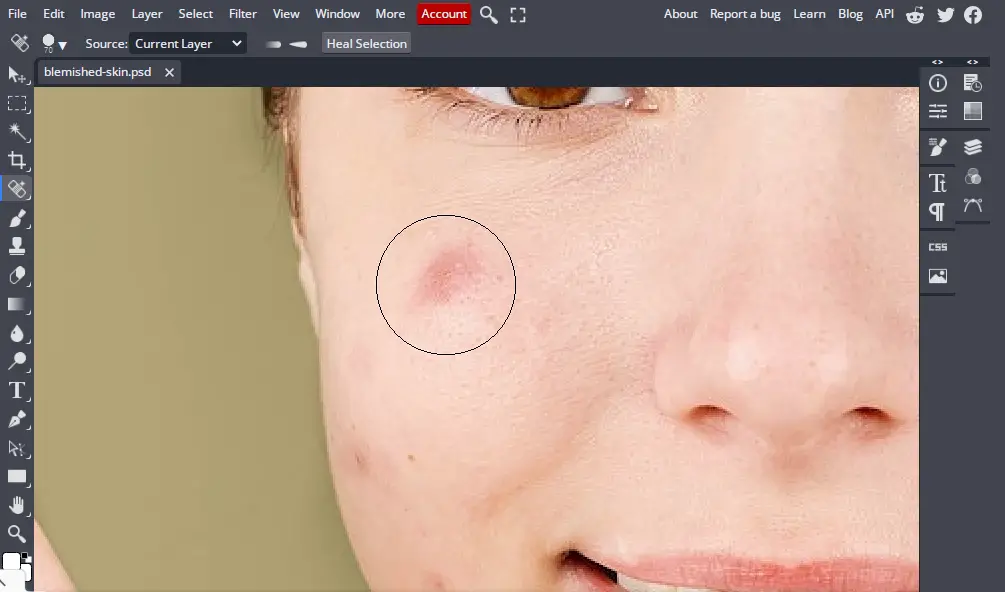
In BunnyPic we can use the Spot Healing Brush Tool to remove imperfections from photos. It’s similar to the healing Brush Tool but since it focuses more on minor imperfections we can use it for things like removing scratches, scars, acne, spots and pimples.
How Does BunnyPic’s Spot Healing Brush Tool Work?
The Spot Healing Brush Tool enables you to remove unwanted objects from pictures. It works by taking a sample of the surrounding area and using content awareness to fill the object you want to remove. Since the fill blends in with the background it appears as if there is nothing there.
It’s also extremely simply to use. You click and drag your mouse to draw over the unwanted object, let go of the mouse and BunnyPic should remove the object. This tool is great for removing skin blemishes as it will fill in pimples, spots and acne scars with the color of the skin.
Usually in Photoshop you would have to use other tools like the Clone Stamp tool to achieve the same effect. However, the process of using the clone stamp tool can become tedious. You would have to select the sample area yourself then fill in unwanted areas manually. This takes some trial and error and can take several minutes, whereas the Spot Healing Brush gets it done instantly.
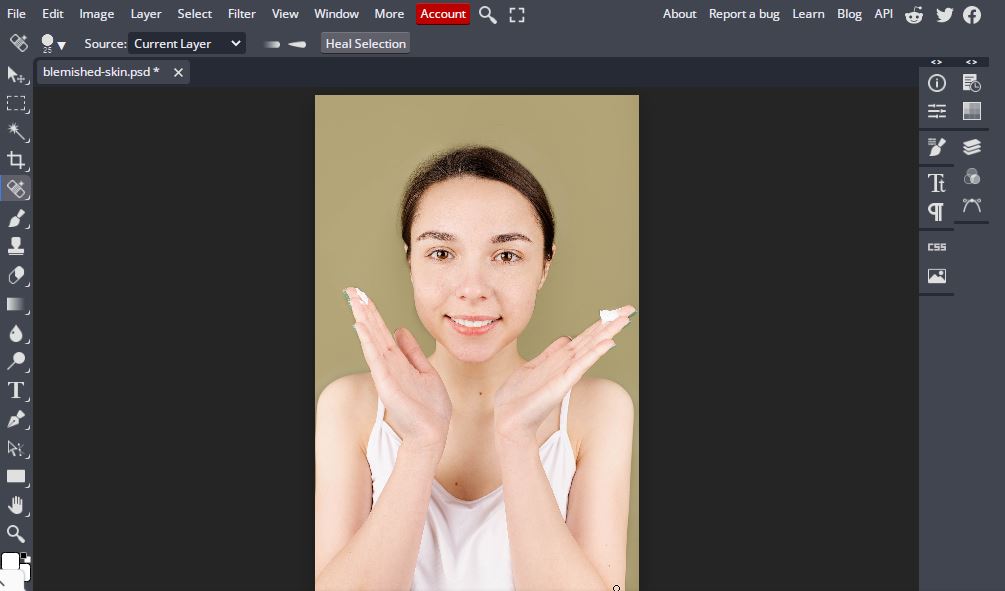
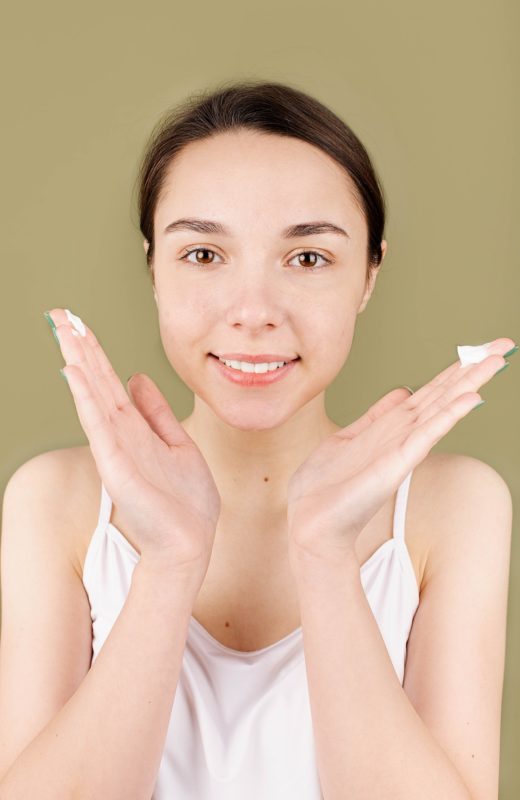
Here is a before and after example of an image using the Spot Healing Brush tool:

1. Open Your Image on BunnyPic
Go to the BunnyPic Editor and open your image by clicking on Open From Computer. You can also drag the image you want to edit straight into the editor to open it directly.
2. Select the Spot Healing Brush Tool
Select the Spot Healing Brush Tool from the left toolbar. It will be indicated with a bandage and “plus” icon.

3. Remove Skin Blemishes by Clicking on Them
After selecting the Spot Healing Brush Tool all you have to do is click on pimples or other minor skin problems and BunnyPic’s A.I. will fill them in. To get started, zoom into the picture by pressing CTRL and + or select the Zoom tool and click on the image.

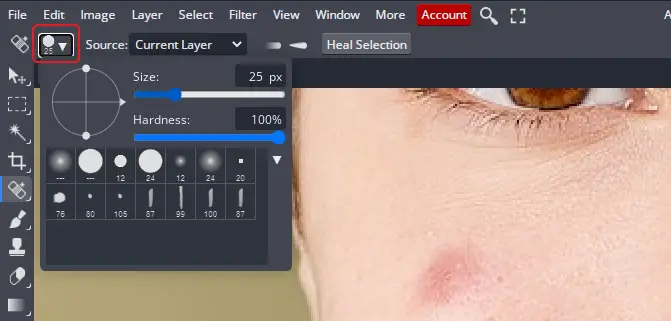
Next, adjust the Spot Healing Brush to better target the blemishes. As a best practice, make sure that the brush size is slightly bigger than the blemish you’re removing. To increase the size of the brush press the right bracket key (]) and to decrease the size press the left bracket key ([).
You can also change the size of the brush by clicking on the brush tip icon located in the top left toolbar. Drag the slider to adjust the size of the brush.
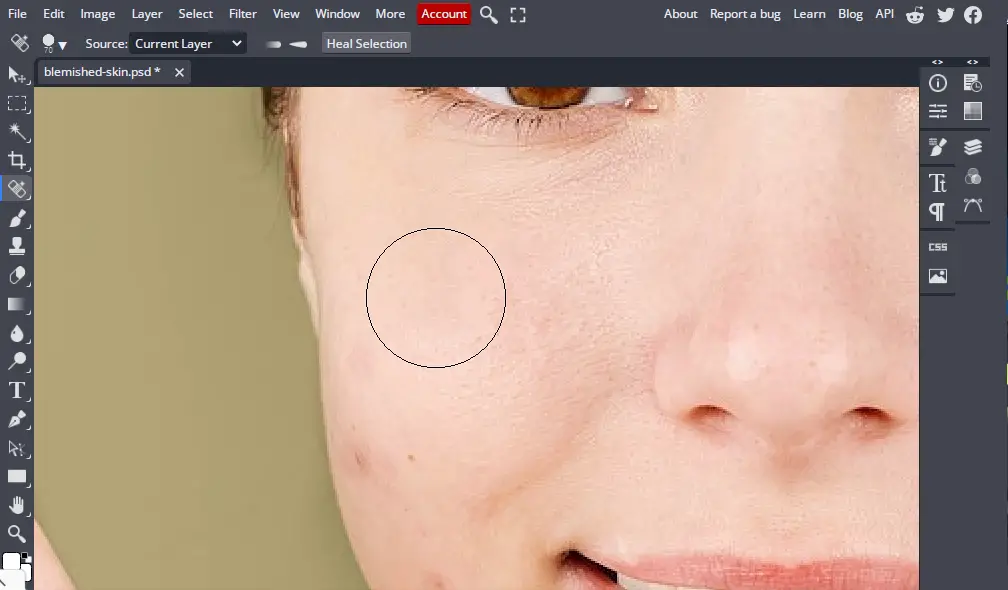
Clicking on the blemishes will remove them. For pimples that are joined together you can even click and hold the mouse and draw over them to remove them altogether. With just one click you can see the blemish is quickly removed:
The next steps are easy. Just keep click on all the other blemishes to remove them until you’re left with smooth glistening skin!
Before and After Comparison

Fixing Mistakes When Removing Blemishes with BunnyPic
It’s normal to make mistakes when trying to edit your photos. However you can easily undo most mistakes by pressing the CTRL + Z hotkey. Also a common mistake when using the Spot Healing Brush tool is not setting the proper brush size.
If you’re using the brush tool to remove spots or pimples try to remove them one at a time rather than altogether. By trying to remove all of them together the BunnyPic A.I. may choose an inaccurate sample for filling in the blemishes.
A better way to remove blemishes is to adjust the brush size by making it slightly bigger than the spot you want to remove. This way the A.I. can comfortably choose an accurate sample for the skin and get rid of the spot.