
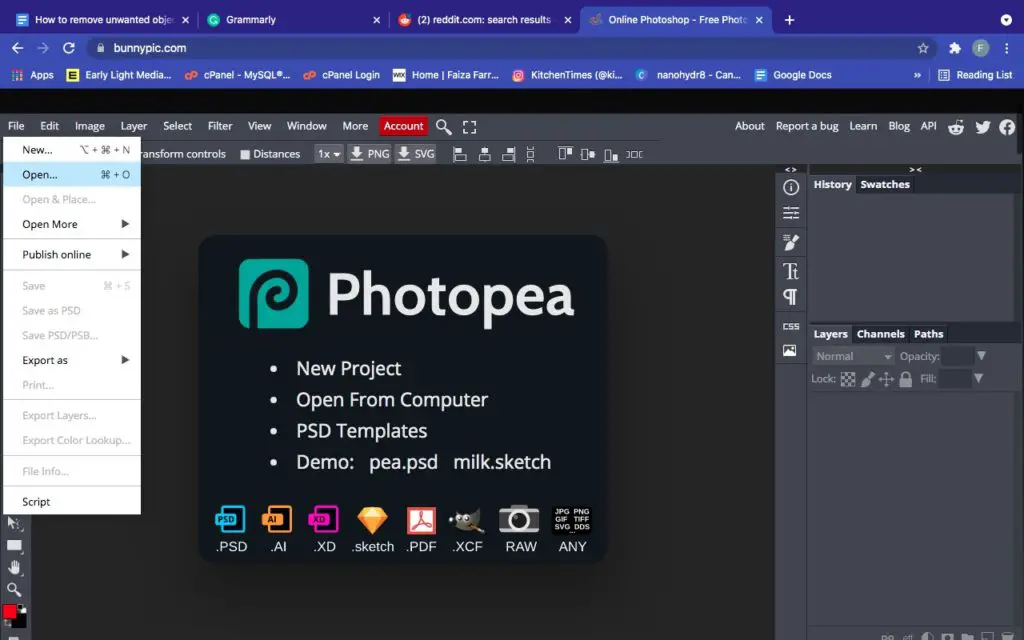
bunnypic.com offers you an easy solution to remove unwanted objects from photos for free.
Now, you do not need to install and occupy your system’s memory with Photoshop, unnecessarily.
By using bunnypic.com you get exclusive interface and features of Photoshop online.
A step by step guide on using Photoshop online on bunnypic.com
A simple method to follow for your desired creation
1. Background Removing Tool of Photoshop
It is Photoshop’s built-in background removal tool. An easy-to-use and go-to option that gives a satisfactory opportunity for people who do not need crisp and precisely defined edges of their subject.
- Open your image from the files option present on the top left in the Photoshop window.
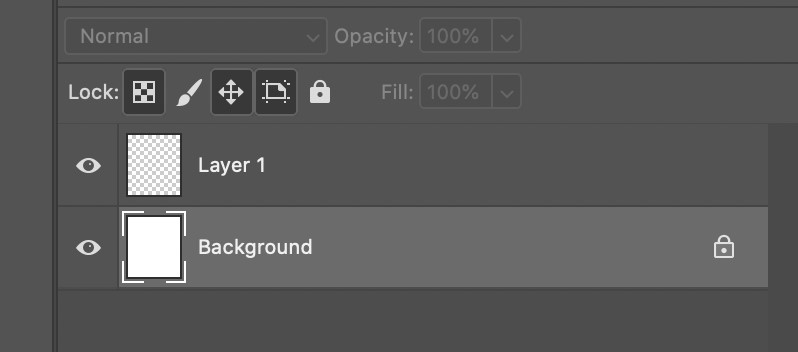
- create a new Layer(+ button) by choosing from the right-hand Layer panel.
- Here you will need to select the Background Layer and deselect any others.
- Expand the panel to see the Quick Actions dropdown menu.
- Click on the Remove Background from that Quick Actions menu.
2. The Background Eraser Tool
Use this tool to eliminate or remove background in pictures with more than a specific measure of fine detail among subject and background.
It works by taking a sample of the shade at the center point of the brush and choosing something similar or comparable hued pixels as you move the mouse.
Want to know how to use the Background Eraser Tool?
The procedure is easy if you follow with concentration.
- Open your image from the files option present on the top left in the Photoshop window.
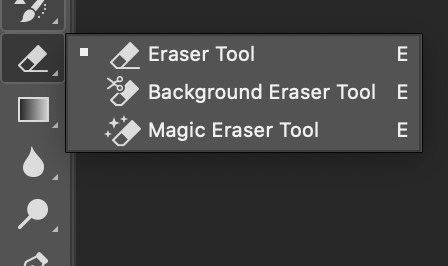
- You can find the Background Eraser Tool present in the Photoshop Toolbox. It might be hidden within the Eraser submenu, so you need to click and hold that or press E to highlight it.
- You can choose the brush size according to you desire. Here, You can use the [ and ] bracket keys or adjust it in the menu bar. Although a larger brush is quicker but if you need precision and if you are working in close-fitting spaces, you can and you must zoom in to achieve best result.
- You will need to use the brush nicely and hard on the slider too. If your subject have unclear edges, you might leave behind artefacts. Shift [ and ] will help you reduce or increase hardness.
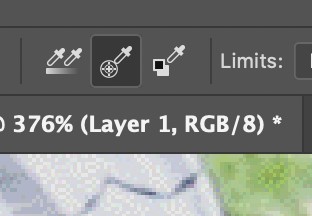
- You need to Set Limits on the menu to Find Edges.
- Now you can place the centre part of brush over the colour you want to remove and click. You will be able to get free of any matching shade within your tolerance and to leave behind other colours.
- Tolerance is about how wide the bracket of hue is that the circle will remove.
- Keep in mind that the Background Eraser Tool will erase any matching colour its crosshairs are over, so you need to keep those on the background colour.
- Background Eraser is always set to Continuous Sampling by default.
This means any matching shades those crosshairs hit upon will be deleted. So, If you have several hues in your background you will have to keep sampling and deleting them. But, if you only have one color (or a narrow bracket of hues) such as a blue sky, you can change to Once.
In this case, it will only sample and delete the hue you started on even if you mouse over another hue.
In case if your background shade and subject shade have a close resemblance and you face the difficulty wiping the subject, we can tell you for another option. Click Protect Foreground Colour (far right of the Tool menu). Press and hold Alt (Win) / Option (Mac) key and use the eyedropper tool which pops up to sample the shade you want to keep safe from damage.
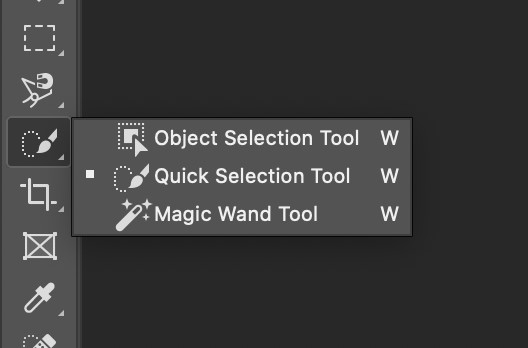
3. The Quick Selection Tool
The Quick Selection Tool of Photoshop utilizes artificial intelligence to choose in real-time where the start of the background and the edges of the subject fall.
This instrument works best when there is a reasonable difference between the selection of your foreground and background. On the off chance that there is a lot of resemblance in the pixels, it will get befuddled and you will have to spend extra time adding and deducting components.
When you are done with selection initially, you can flip between adding to the selection and subtracting from the choice in the menu.
How to use the Quick Selection Tool
- From the files option, open your image in Photoshop.
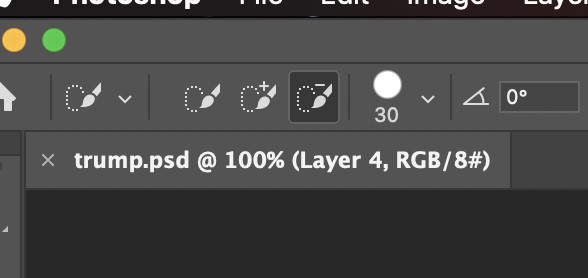
- You can find the Quick Selection Tool from the menu on left hand in Photoshop Toolbox. It could be placed in Magic Wand Tool.
- To get a smoother and high- quality edges selection, Check on to the Auto-Enhance in the Options bar.
- You need to click the button and start moving the pointer over the area you aim to select. Quick Selection will find tones that match the selection until it thinks it’s found an edge.
- If You want to add more to the selection, simply click and drag over another area.
- To subtract from the selection, press the Option key (macOS) or Alt key (Windows) and move over to the desired section you aim to deselect.
- Alternatively, you can change the Tool to deselect (minus) by choosing from the menu bar to deselect areas you mouseover.
- The Pen Tool
You can draw around an area using a pattern of straight lines and flexing curves with the help of The Pen Tool. It allows you to toggle between the two by mousing over a node and pressing the Control/CTRL key.

You can use the Pen Tool to create a Path (on the far left in the layer panel) and then click cmd/Ctrl+click to transform it into a selection.
Increase the feathering of edges a little bit If you are working with a selection because hard edges would look odd, particularly against a vivid background.
Want to Refine your selection?
We have told you several ways of removing the unwanted objects from the background using Photoshop online on bunnypic.com.
But to get a perfect elimination or removal of the unwanted objects, Photoshop allows you to combine methods, especially if you work in Paths, meaning you have a choice to alter the outline of a selection as you go along.
If you are unable to get your desired result, for example, you could select the subject with the Quick Selection Tool and use the Background Eraser Tool to remove background shades left behind by the method you used earlier.
You can also make your initial selection and then click the Select and Mask button.

A whole new set of options will be available to alter the edges of your selection or change the type of the edge (for instance, you may feather it to look softer or increase the contrast to look sharper).
We are listing the edge-changing tools from top to bottom
1.Quick Selection: We have already told you about this.
2. Refine Edge Brush Tool: With this tool Photoshop rapidly choose among contrasting pixels (like pixels with hair and the pixels next to hair)
3. Brush Tool: This tool allows you to directly paint onto your selection to add to it. You will have to zoom right into your picture and adjust the size of the brush with the help of [and] keys.
4. Object Selection Tool: With this option, Photoshop will identify the boundaries of isolated items or shapes within the mask.
5. Lasso Tool: This tool gives you the facility to generate a freehand selection.
Operating photoshop on bunnypic.com is kind of user-friendly. You can do a try-and-error approach to see how it works! We hope our guide about the removal and elimination of unwanted objects and backgrounds using Photoshop online with bunnypic.com has given you complete insight.
If you want to know about anything more, tell us in the comments section below!