
GIFs can be a fun way to communicate. Sending funny GIFs to friends and family on WhatsApp is a practice we all know too well. But, did you know you could use GIFs to create awesome photos as well?
It’s totally possible to add a GIF to your still images to give them a cool animated effect. Many people have also incorporated GIFs into their professional work as well. Embedding GIFs into PowerPoint presentations and websites has also started to become common.
Adding GIFs to your images really makes them stand out and much more interactive. GIFs have proven to perform better with audiences as well by engaging them with creative graphics. In this article, I’ll explain what a GIF is and how you can add it to your images in BunnyPic.
What is a GIF?
A Graphics Interchange Format or GIF is a moving image or short animation. These are usually short 4-5 second videos that are used in humorous ways. GIFs have been and are still used the same way as emojis. If you receive a text, you reply with a GIF that’s suitable for the conversation and send it.
GIFs use a series of still pictures and play them at a fast speed to animate them – this is called frame-by-frame animation. GIFs might be an outdated image format for the web but is still pretty popular for most apps and uses.
When you use Facebook or Snapchat you’ll have an option to insert GIFs into your comments and photos. Many keyboard apps on smartphones have also partnered up with GIF companies like GIPHY and Tenor to serve GIFs quickly to users.
You can look at a huge library of GIFs on websites like GIPHY, Tenor, and Gyfcat or make your own. Once you have the GIF you like downloaded you can also overlay it to images online. There are many ways to do this but our BunnyPic software gives you the most control.
How to Add a GIF to a Still Image in BunnyPic
BunnyPic is a free online photo editor that uses powerful API from Photopea. BunnyPic has a lot of the tools Photoshop has – which is the best photo editing software in the world. You don’t need to have any previous experience in motion graphics to add GIFs to images – it’s actually very easy.
To overlay GIFs on a still image in BunnyPic, follow these simple steps
Setting Up
Before we go into how to overlay GIFs to our images we need to have an image and a GIF to get started. If you have already downloaded your files you can skip this part.
First, we’ll download our still image. There are many free stock photo sites you can download images from. The most popular are:
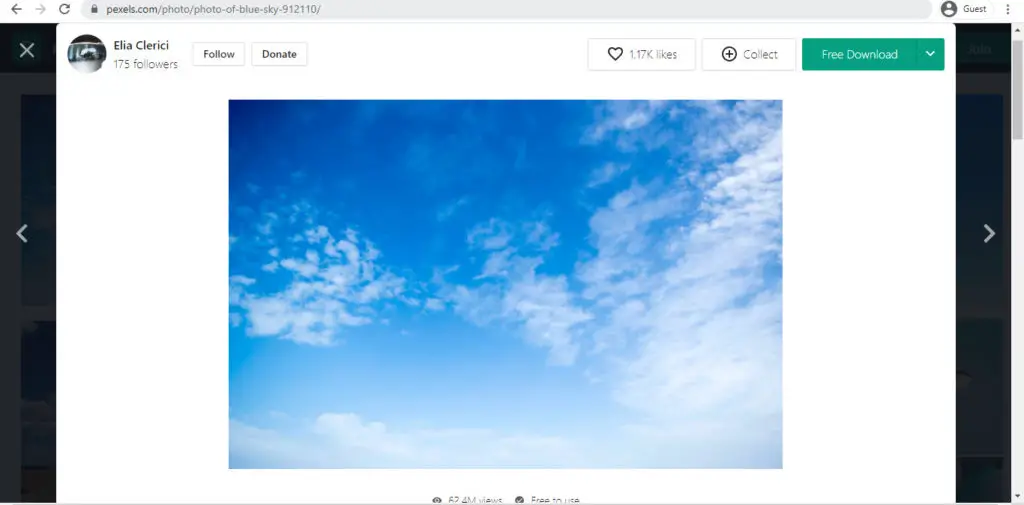
I’ll be using Pexels for this example and downloading a bright blue sky. Just type in the image you want in the search bar, click on the image you like, and on the top right you’ll see a Free Download button. Clicking on it will download the original size but that’s too large. To download a smaller version, click on the arrow beside it and download the appropriate size.
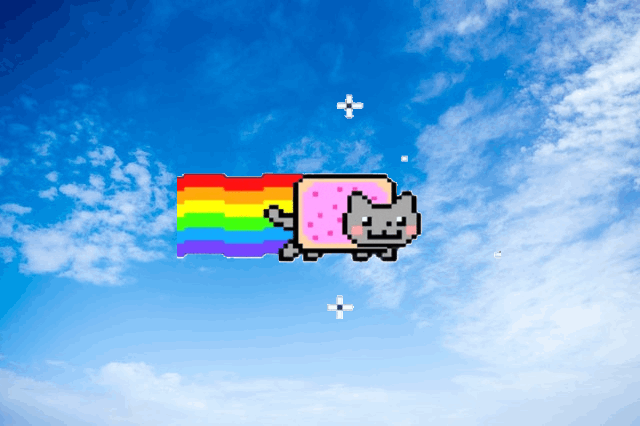
We have our image now it’s time to get a GIF. You can search for popular websites like GIPHY or Tenor to find GIFs. I’m using GIPHY and using a GIF of the iconic Nyan Cat.
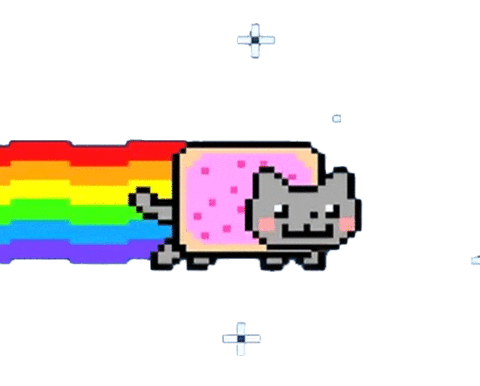
When you have selected your GIF just click and drag it to your desktop screen and it will automatically download it as a GIF file. If you want to specify a destination for your GIF right-click on the image > Save As and choose the destination folder.
Now that we have all our files it’s time to start editing in BunnyPic!
1. Open Your Image
Go to the BunnyPic editor and open or drag the image you want to add a GIF to. Make sure that the image isn’t too large as it takes up a lot of RAM and may slow down your computer.
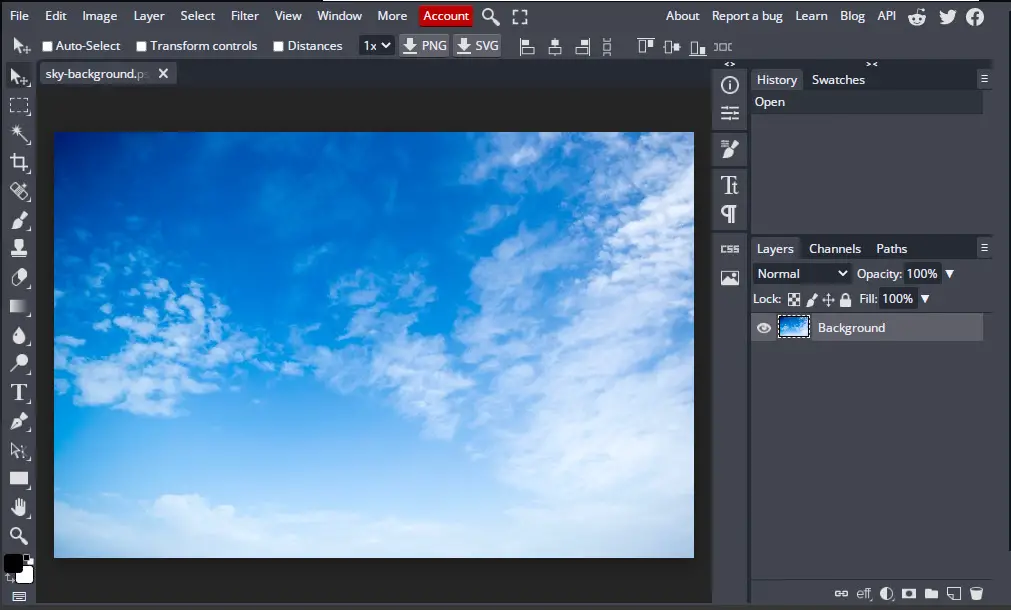
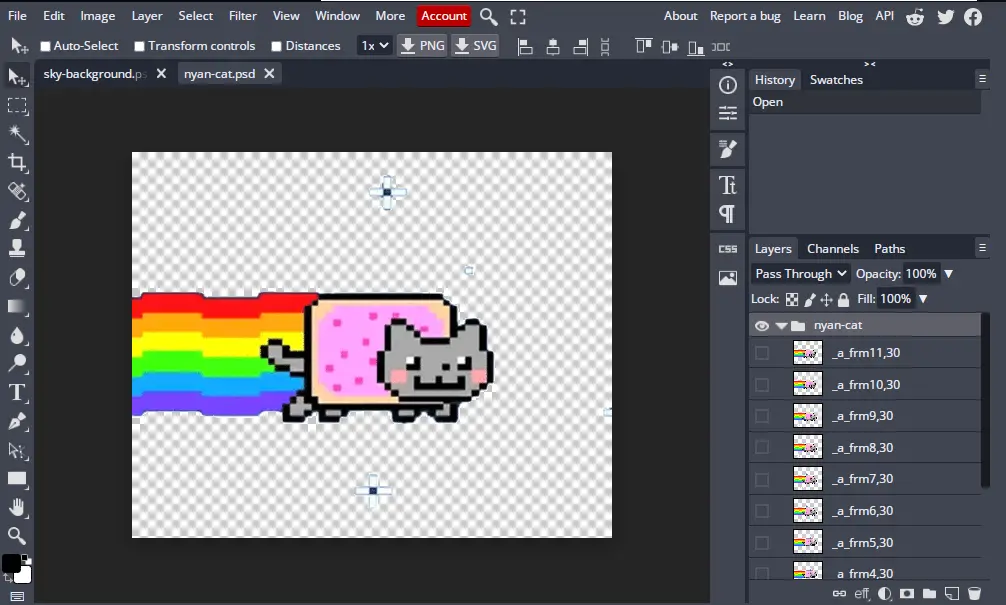
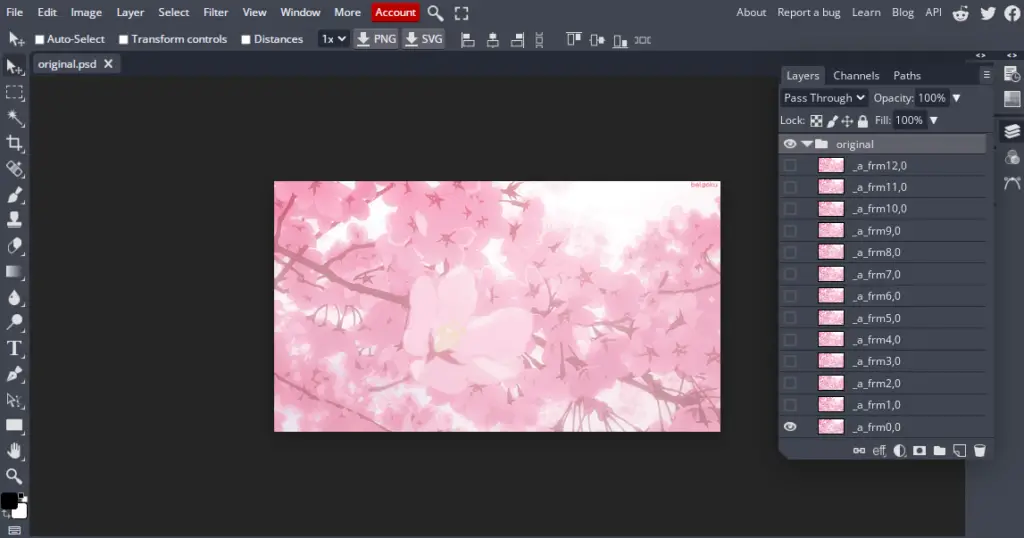
Now, go to File > Open and open your GIF file. Once you open your GIF file you’ll notice it appears as a normal image. However, if you open the Layers panel you’ll see several hidden layers – these are frames for your GIF animation. With the layer panel opened, you’ll notice that all your layers are grouped in a file. The file will be the same name as your GIF image – in my case, it is “nyan-cat.”
2. Add Your GIF to the Still Image
We have our image and GIF inside of the BunnyPic Editor, now all we have to do is duplicate the GIF layers into our image. To do this,
- Select the layer folder from the GIF file and right-click on it and choose Duplicate into. A box should appear asking you to specify a destination.
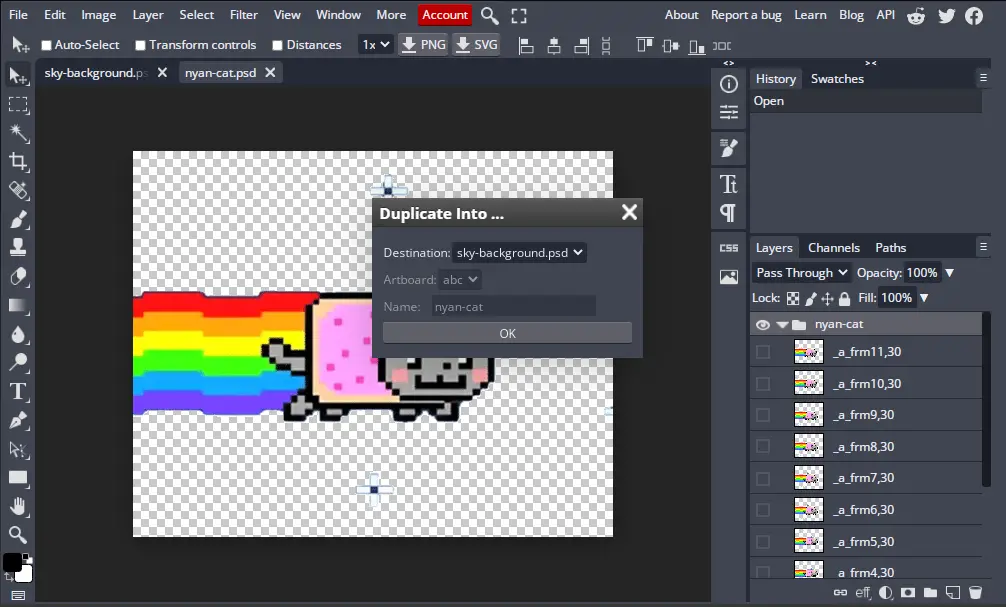
- Choose the tab of your image. In this case I’ll be choosing “sky-background.psd.”
- Once done click OK. Your GIF image should be duplicated into your image.
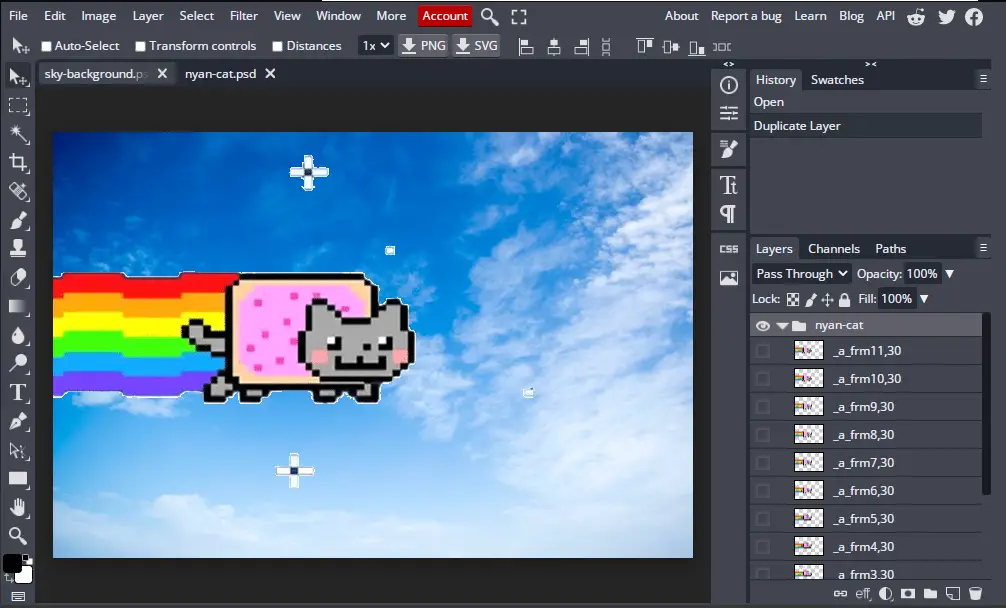
The image doesn’t look properly placed so we’ll adjust it a bit so it fits better.
3. Adjust Your GIF Image
With our GIF overlay on our image, we’ll make a few adjustments so it’s perfect. You can click and drag your GIF to move it around. If you want to change the size or rotate it you can do so by clicking Transform Controls on the top toolbar. A border would appear around the image allowing you to freely transform your image as you like.
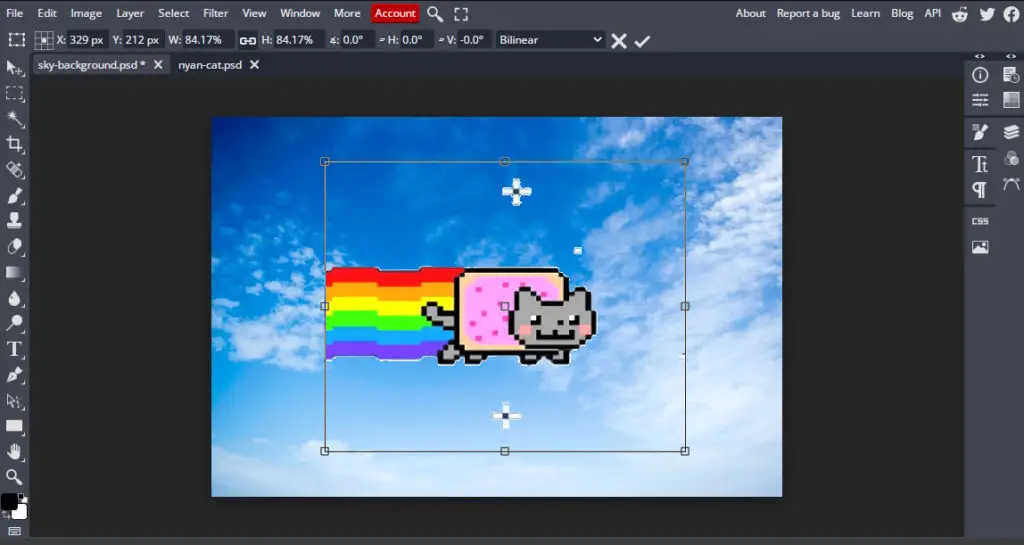
Once you have made your adjustments just click the tick icon on the top to save changes. Don’t worry about messing up the layers. Since all the layers of the GIF file are grouped into a folder all of them will move with the layer.
4. Save Your Image
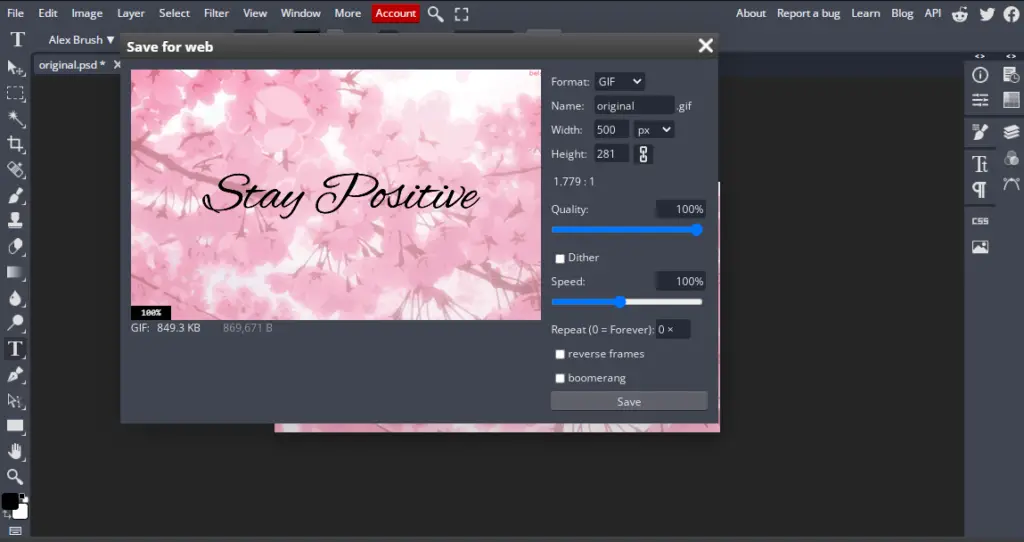
Finally, our image is complete and all that’s left to do is save it. To save your image go to File > Export As > GIF.
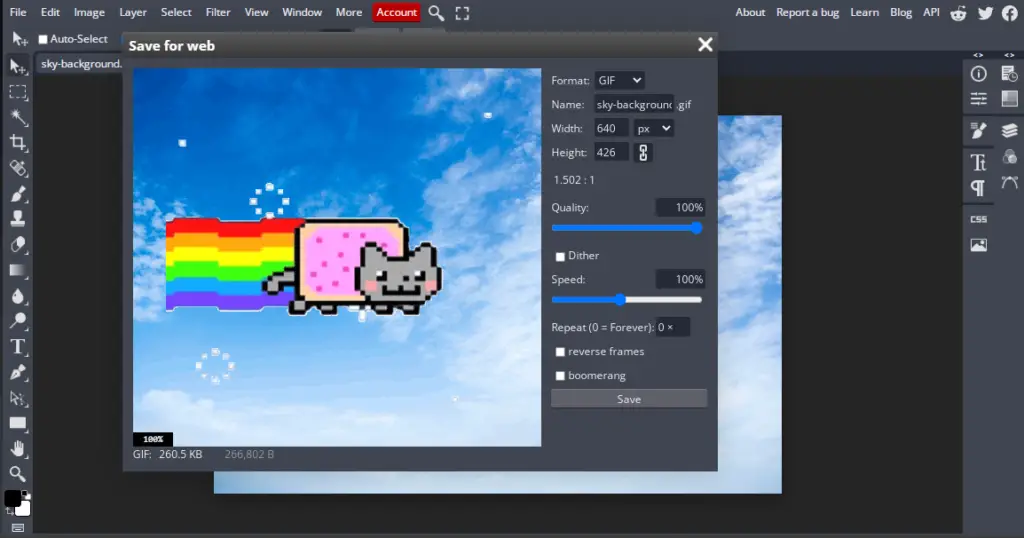
You might see your image moving when you are in the save panel, which means everything’s good to go. You have a few options to save your GIF image. You can adjust the speed to make the animation slower or faster, reverse it or reduce and even turn it into a boomerang!
Once you are satisfied, hit Save.
This is what our final result looks like:
How to Add Text to GIFs
Adding text to your GIF is pretty easy to do in BunnyPic. Just follow the steps below to add text to your GIFs in BunnyPic.
- Go to the BunnyPic editor and open your GIF file by clicking on Open from Computer. and open your GIF file by clicking on Open from Computer.
- Next, from the left tool bar click on the Text icon to write your text. Click anywhere on your image and start writing.
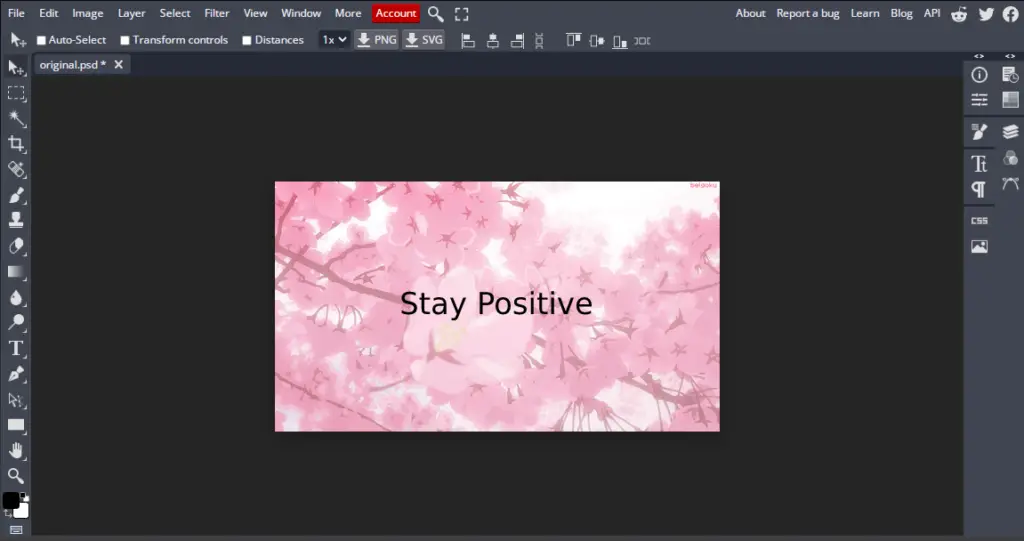
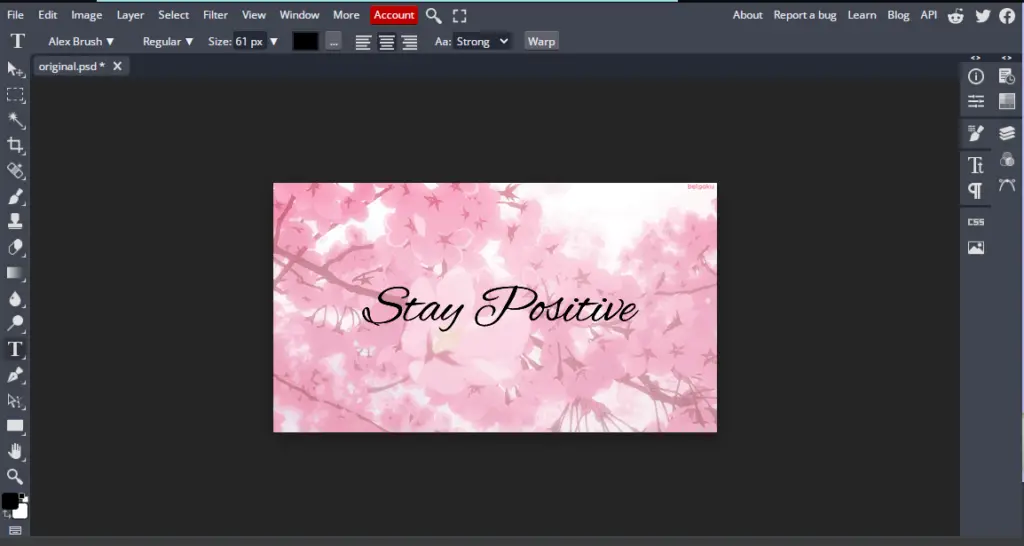
- Adjust the font, size and weight as you like. The default font is a little bland so let’s choose a beautiful handwritten font. You can access a huge library of BunnyPic’s selected fonts from the top toolbar and choose the one you like.
- Finally go to File > Export As > GIF and save your image as a GIF.
Here’s what our final result looks like:

Conclusion
GIFs have remained popular since their release in 1987. Another exciting way to use GIFs is to overlay them on images. Using BunnyPic, our free editing software is the easiest way to overlay GIFs on images online. By reading this guide you would know how to add GIFs to still images and texts on GIFs for your image without expensive Photoshop software.