
In the 21st century, it’s hard to imagine a day passing by without taking photos. Thanks to smartphones, everyone has a camera in their pockets all the time; allowing them to capture their best moments instantly.
However, there are times when your phones don’t capture the photo the way you want them. Photo editors like BunnyPic can help you invert the colors of your photo to give it a cool effect, better enhance the contrast or provide better color options to colorblind users. You would also want to invert the colors of your photos if you want to convert your old photo films into digital images.
In this article, we’ll go through a few ways you can use our free online tool BunnyPic to invert your photos to negative and convert your photos from negative to positive.
How to Make a Photo Negative in BunnyPic
A negative photo is basically a photo with inverted colors. This means that black turns to white, blue turns to orange and yellow turns to purple. This formula follows the color wheel. Colors opposite from each other on the color wheel are complementary to each other and when you invert the colors of your photo all colors are turned to their color complement.
To make a photo negative in BunnyPic:
- Go to the BunnyPic Editor and open your photo.
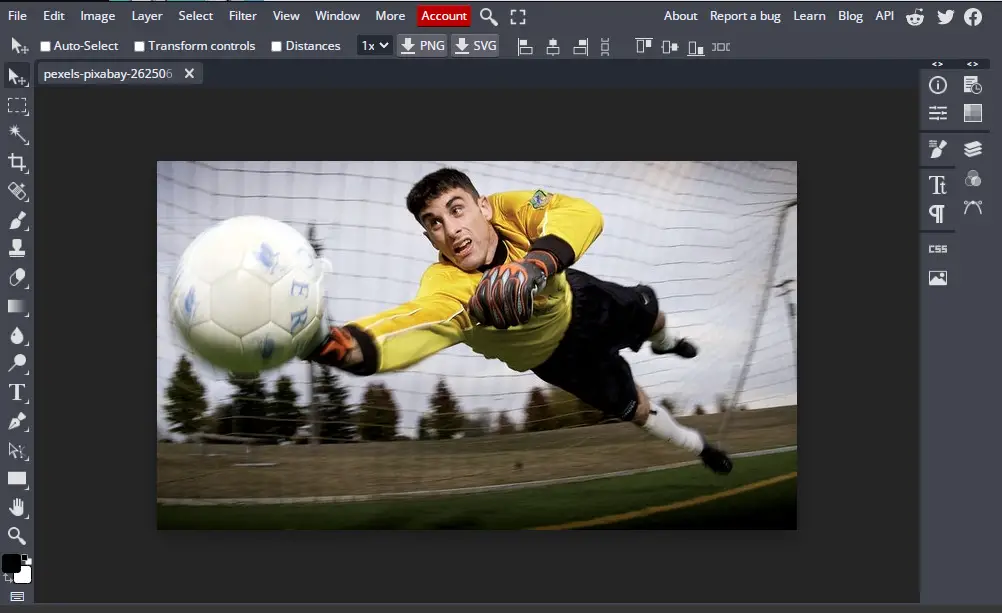
- With your image open in BunnyPic go to Image > Adjustments > Invert.
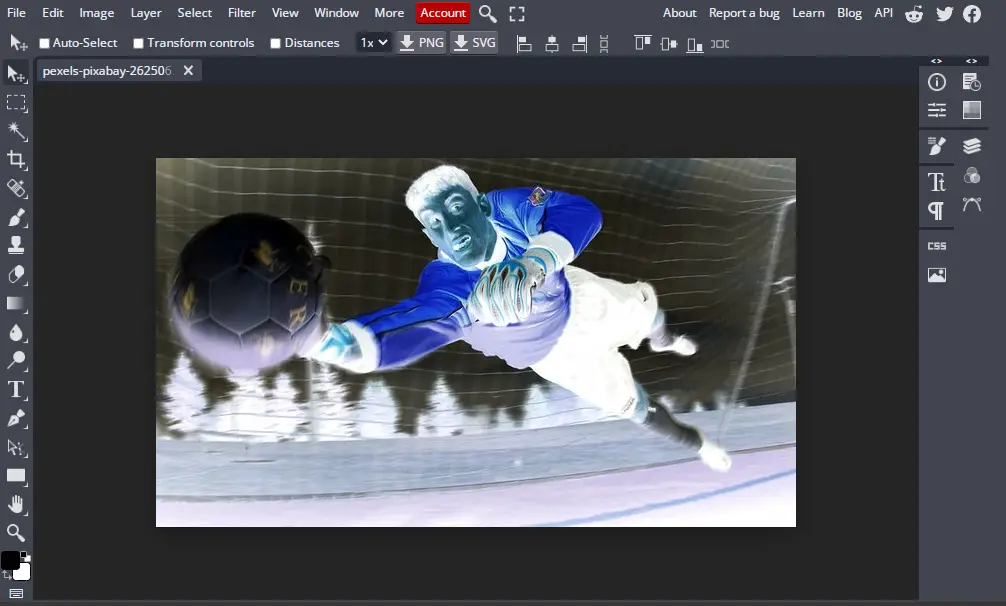
And that’s it. A simple 2-step process and you’ve converted your photo into negative!
How to Convert Negative Photo into Positive
Cameras have advanced quite a lot but, photo editors have come a long way as well. It’s not uncommon to find camera films filled with old photos lying around your house. Maybe you were going through your parent’s childhood memories and saw an ancient 8mm or 35mm camera film.
With time, these images tend to age and get damaged. Fortunately, there are ways to preserve them. You can use online photo editors like BunnyPic to convert your photos into digital images. Since these films are printed in negative you can convert them into positive to preserve the actual colors.
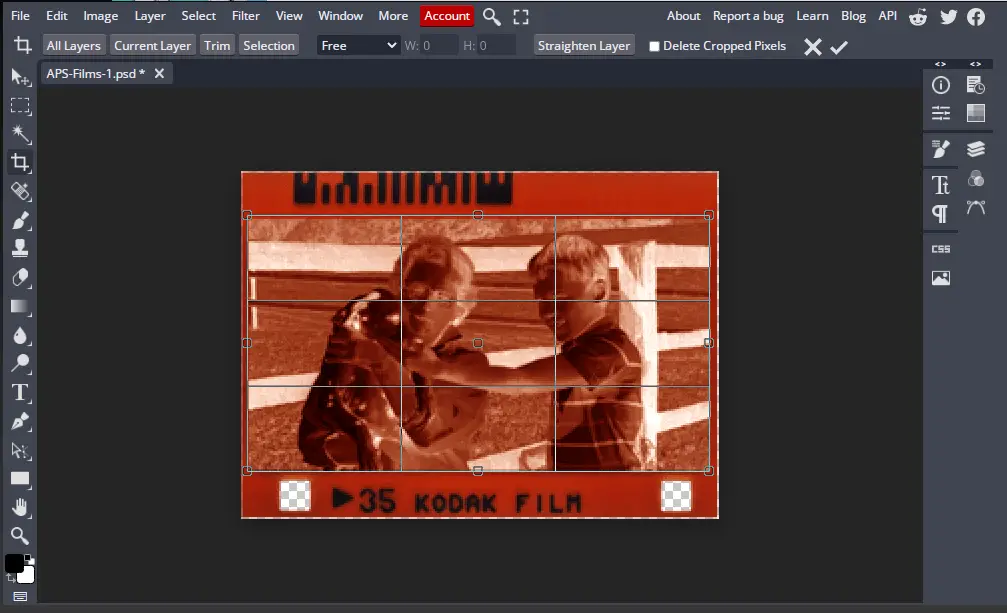
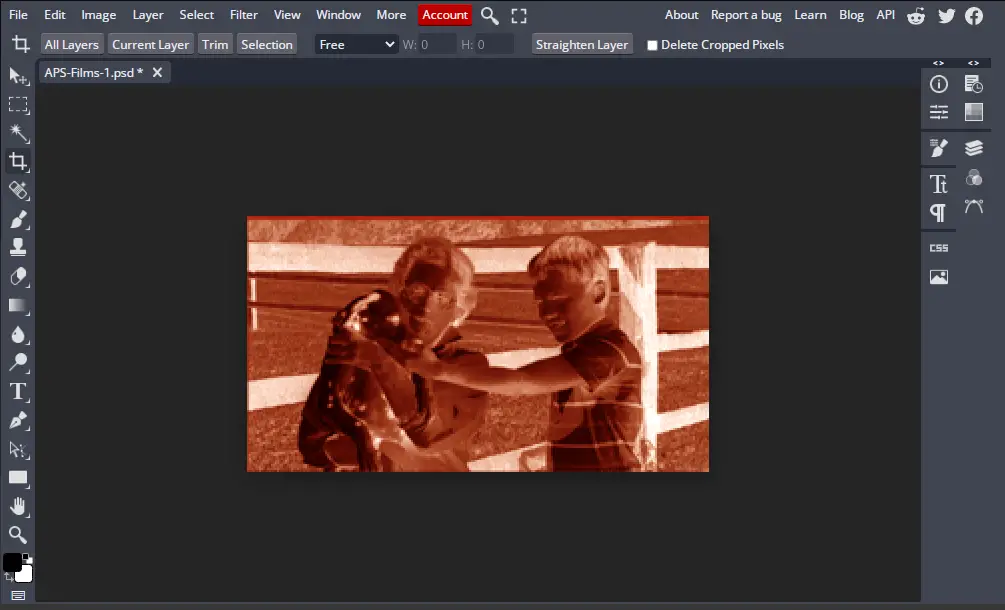
- Before going to BunnyPic we have to take a photo of the negative. Place the negative film in front of a bright light so light passes through and the image is clear and take the photo.
- Now send the photo from your camera to your computer and open it in the BunnyPic Editor.
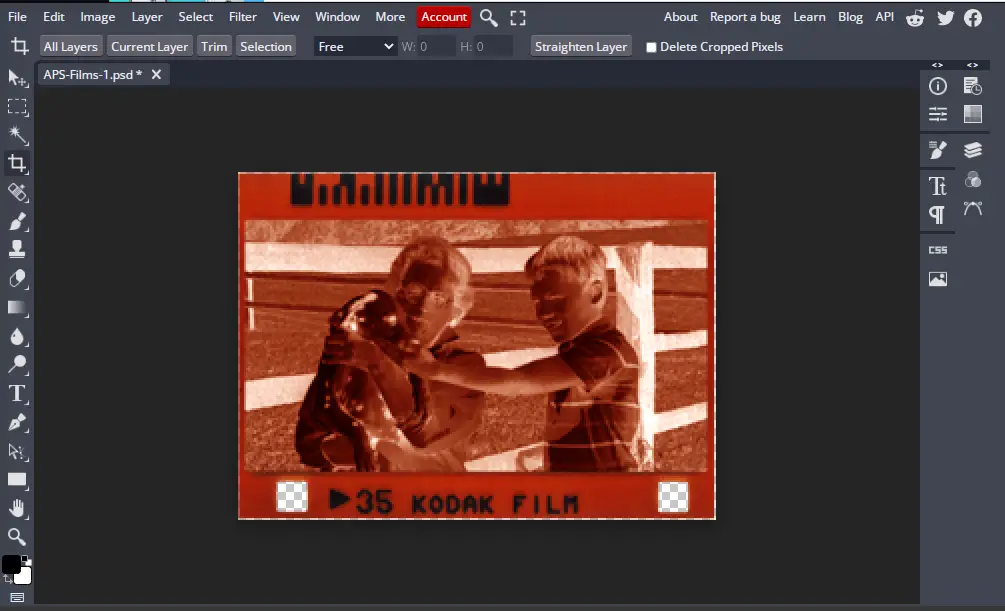
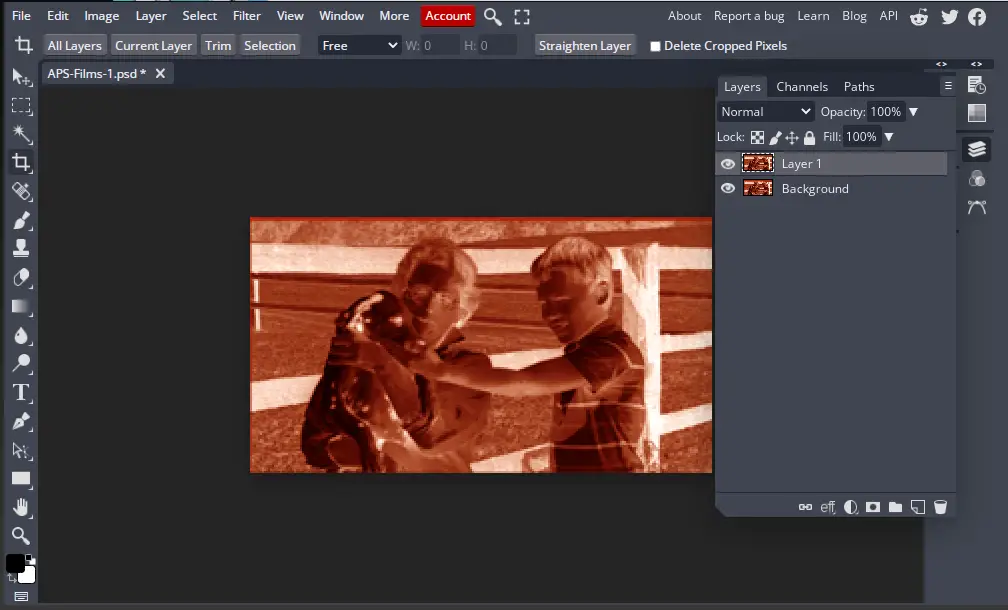
- Once opened, crop the photo so that only the actual scene is there. To crop the photo select the Crop tool from the left toolbar and drag the corners of the image to remove the unnecessary parts.
- Next, make a copy for the layer for “non-destructive” editing. Go to Layer > New > Layer Via Copy or press CTRL+J.
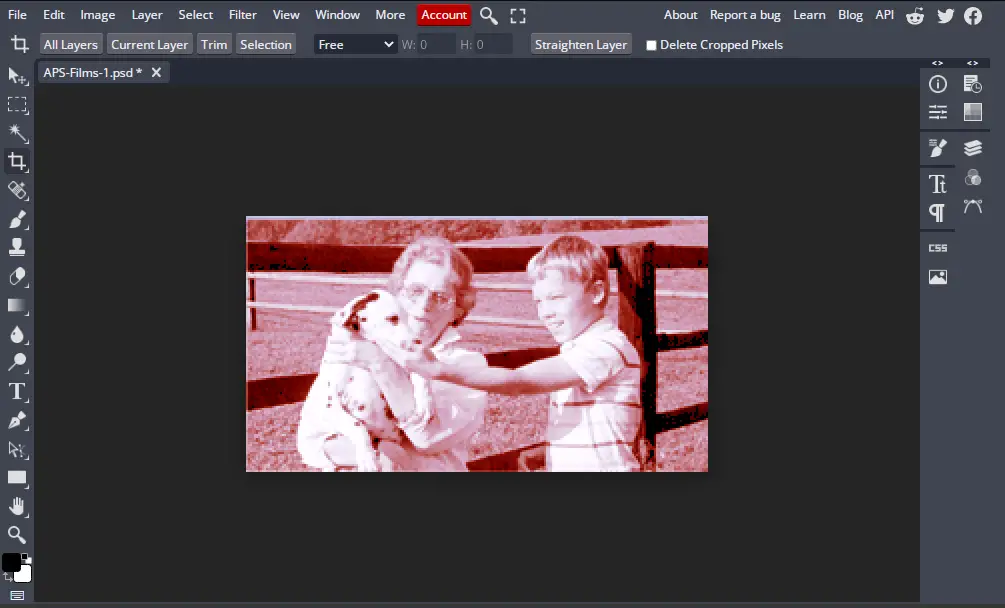
- Now, invert the colors by going to Image > Adjustments > Invert.
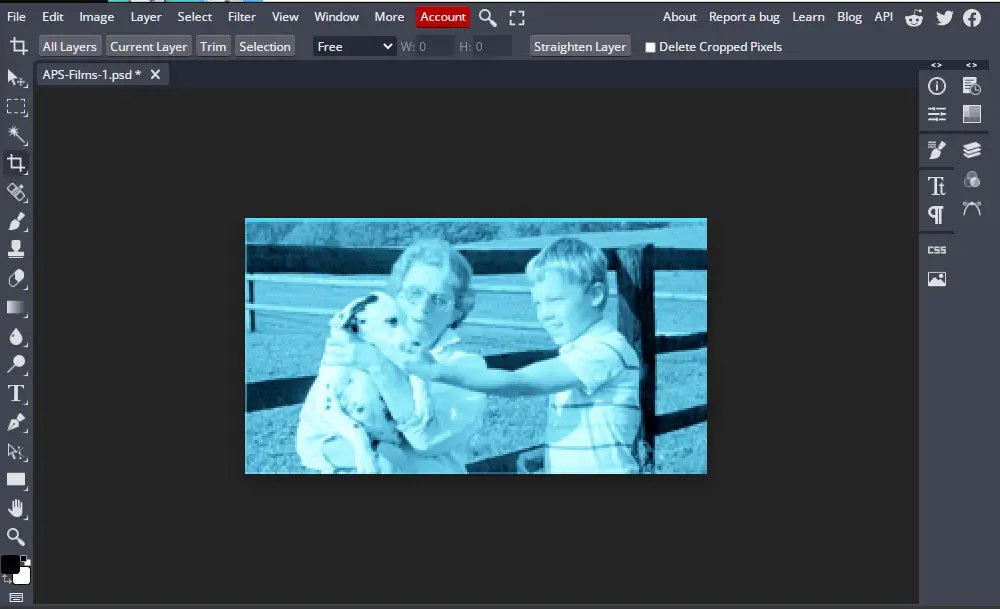
- Our image is looking much better but it is too blue. To fix this, we can use adjustment layers to control the RGB colors. Open the Layers Panel and at the bottom, click on the adjustment layers icon and select Levels.
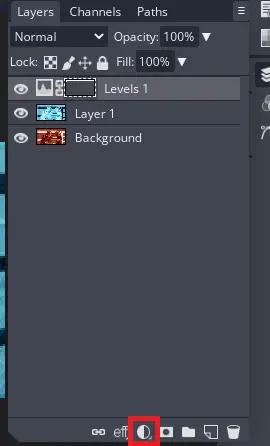
- Adjust the Red, Green, and Blue color values until the true color (the color of the actual image taken by the camera) appears.
If you find any of the above steps difficult you can follow this helpful video by Robert’s Production.
How to Make a Photo Negative on Android
Since our free online photo editor, BunnyPic is only functional for computers we know there are people who don’t have access to one. No need to worry because it is also possible to invert the colors on your Android phone. To turn your photos negative on Android:
- On your phone go to Settings.
- Go to Accessibility. This would be indicated with a hand icon.
- Under Accessibility, tap Color Inversion or Invert Colors to turn the phone’s colors into negative.
Now, you should see everything with negative colors.
How to Make a Photo Negative on iPhone
Converting a photo from positive to negative or negative to positive is pretty easy to do even on the iPhone. You have a number of options to invert the colors of your photos. You can use third-party apps from the app store, enable the accessibility settings or use online tools.
Accessibility Settings
Enabling the invert colors option from accessibility settings is the fastest way to turn photos into negative on IOS.
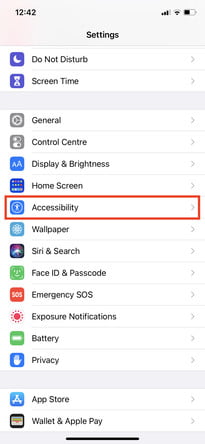
- Open the Accessibility Settings and go to Settings > General > Accessibility.
- Under the Vision section, tap on Display Accommodations.
- Tap on Invert Colors.
- Tap on the toggle switch for the mode of Invert Colors you want.
In the newer IOS versions, you have a few more options when it comes to inverting the colors.
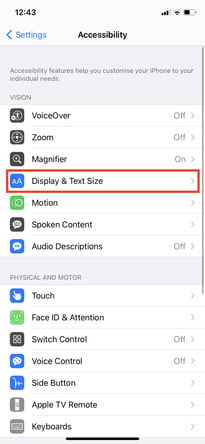
Go to Settings > Accessibility > Display and Text size. Over here you’ll see 2 color inversion options – Smart Invert and Classic Invert.
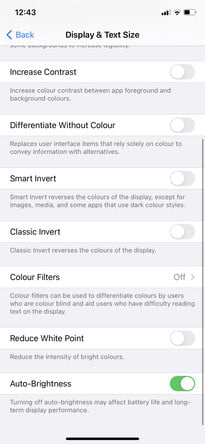
Smart Invert inverts only part of your screen’s colors. Images and certain media that have a darker color scheme would be excluded and all other colors would be reversed.
Classic Invert inverts all the colors on your screen – including images. Assuming you also want photos to be inverted you would go for this option.
It would also help to create a shortcut for inverting colors. This way you could quickly switch between negative and positive colored photos. To do this:
- Go to Settings > Accessibility > Accessibility Shortcut.
- From there find Classic Invert and turn it on.
If you don’t want to use the accessibility options of the iPhone there are other apps you can download.
Using Third-party Apps
There are several apps on the app store to turn positive photos into negative ones. You can search and download apps you like but I would suggest Negative Me from the IOS app store. It’s free and super easy to use. All you have to do is upload your image and it would invert it for you.
Using Online Tools
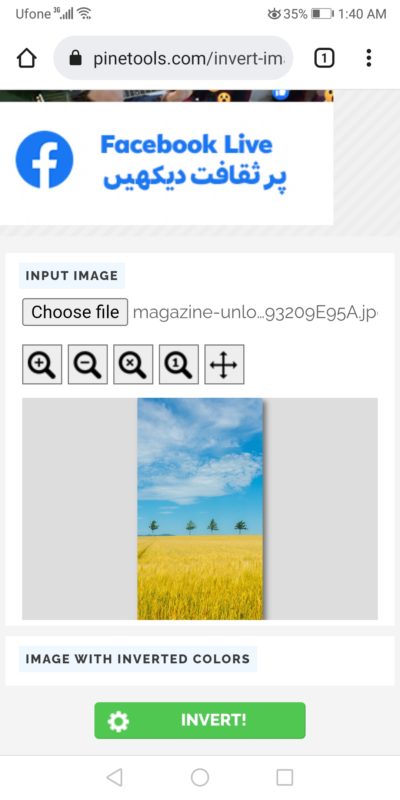
One final option for iPhone users is to use online tools like websites that invert the colors of your photos. One such website is Pinetools.
To turn photos into negative on iPhone using online tools:
- Go to Pinetools.com/invert-image-colors.
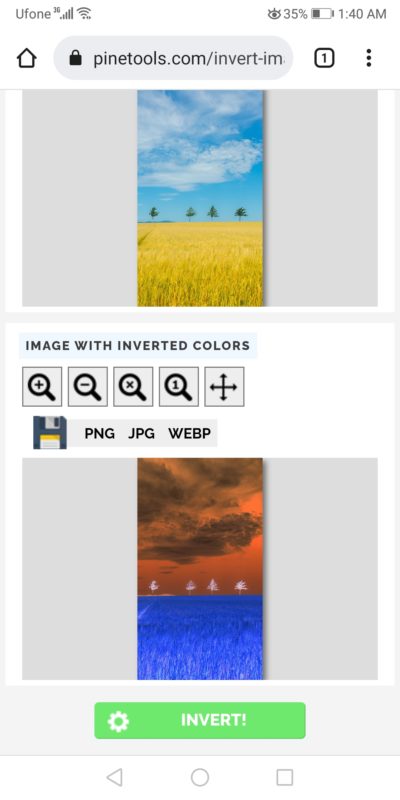
- Click on Choose File and insert the image you want to turn into negative and tap Invert.
- Instantly the colors of your image would be inverted. The resulting image can be downloaded in PNG, JPG, and WEBP.
Conclusion
Inverting the colors of your images to turn them from positive to negative can lead to some cool effects and better accessibility options for colorblind users. 8mm and 35mm films also include negative photos which can be inverted to make digital copies.
Our free online photo editor BunnyPic lets you make your photos positive or negative. It’s fully online and easy-to-use giving you almost all the tools of Photoshop for free. It is also possible to turn photos to negative or positive with your smartphone. Android and iPhone users have different options but it is possible for every device.