
Vector graphics are images that are made from points that connect together to make curves and strokes. Raster images on the other hand are made from pixels called a bitmap.
Vector graphics have a unique advantage over raster images as they can be scaled up and down as they are high-resolution images that don’t get pixelated regardless of scale.
Photoshop is raster-based graphic design software that loads images using bitmaps. This might leave you worried as you cannot export your images as vector graphics to be scaled.
This article will guide you through how to turn a raster image into a vector graphic using Photoshop.
How to Turn a Raster Image into a Vector Graphic in Photoshop
Follow the instructions below to vectorize an image in Photoshop.
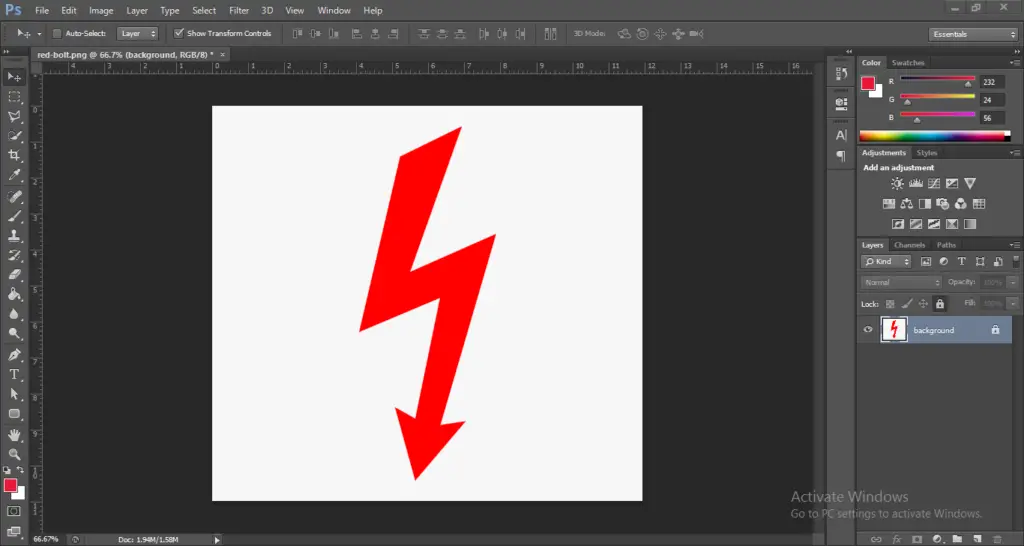
- Open the image that you want to turn into a vector graphic. Make sure it is a one color image as this trick only works on images that don’t have multiple colors.
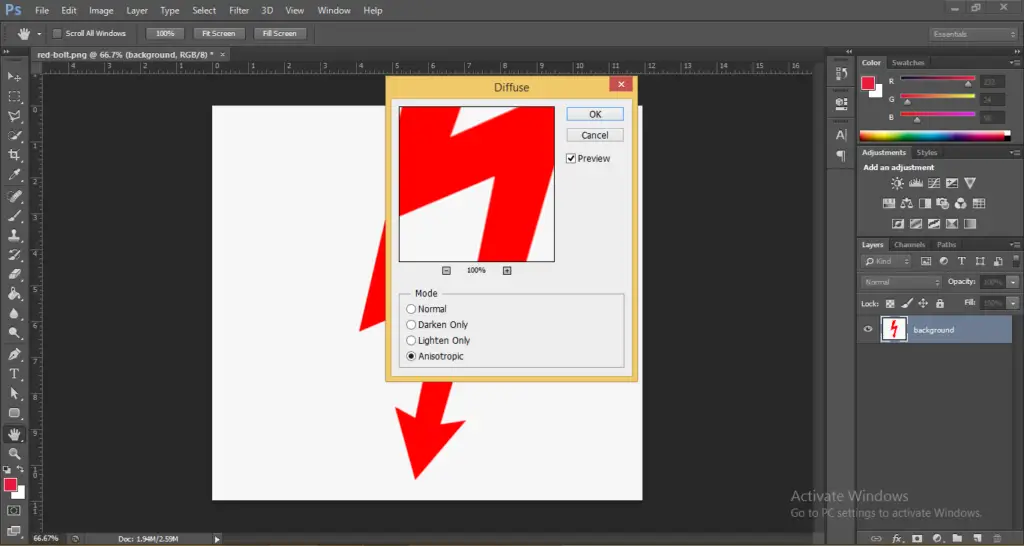
- With the layer selected click on Filter > Stylize > Diffuse and select Anisotropic Mode and click OK.
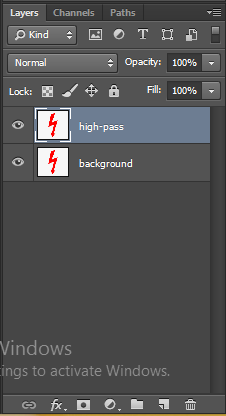
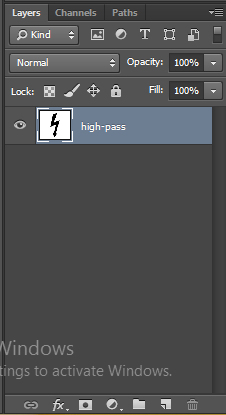
- Next, duplicate this layer by going to Layer > Duplicate Layer or pressing CTRL + J. Name the duplicated layer “high-pass” for now.
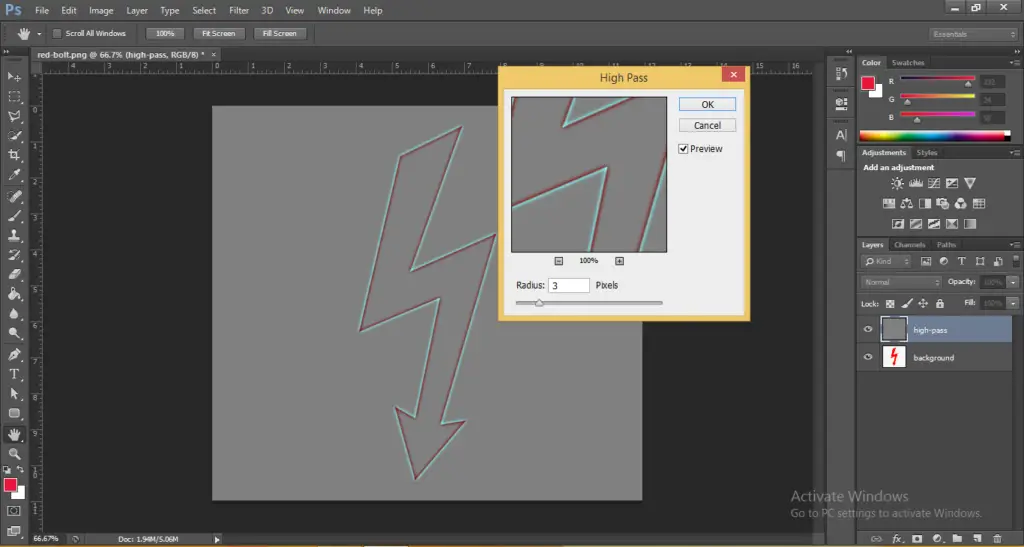
- With the high-pass layer selected go to Filter > Other > High-Pass. Adjust the slider until it matches the strokes of your image and click OK.
- Under the layers panel select the high-pass layer and from the blending mode options select Vivid Light.
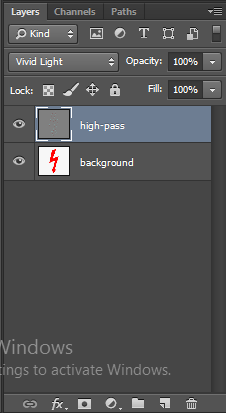
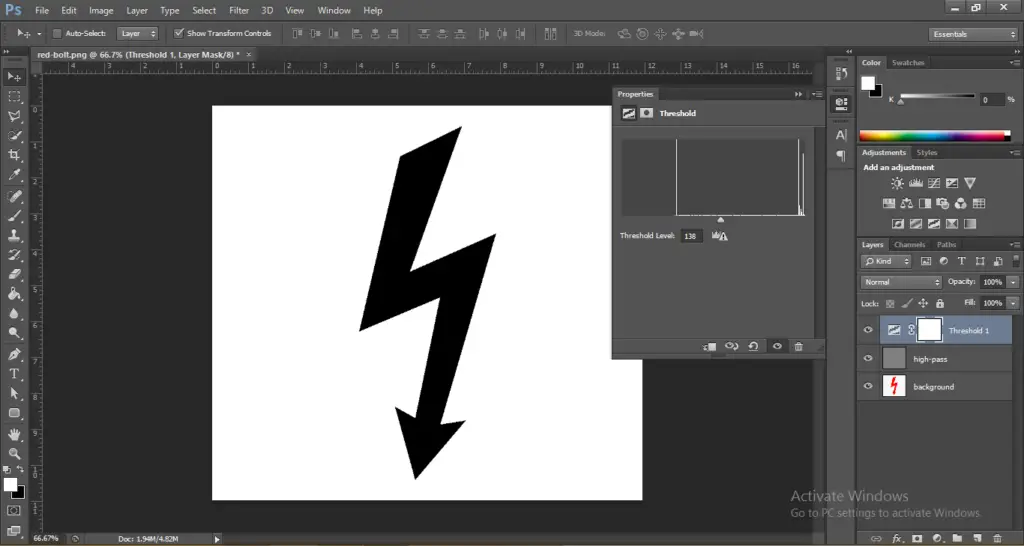
- Now, go to Layer > New Adjustment Layer > Threshold and click OK. Adjust the threshold according to your image until it makes it fully black and white.
- Once you have set the threshold correctly navigate to Layer > Merge Visible. This will combine all the layers together into one layer.
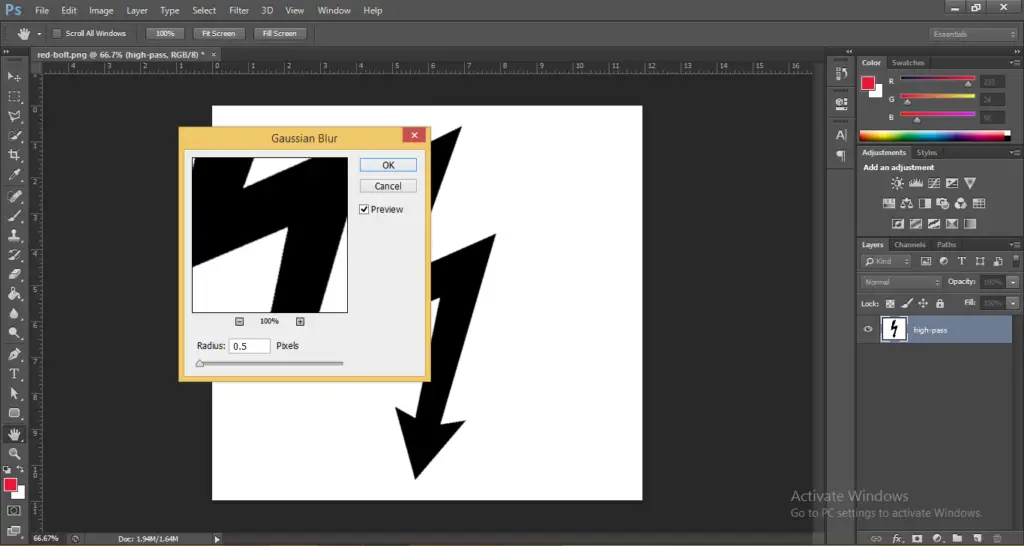
- With the merged layer selected go to Filter > Blur > Gaussian Blur this will blur out the rough edges. Adjust the value until you see a smooth blur in this case 0.5 looks okay. After setting the blur click OK.
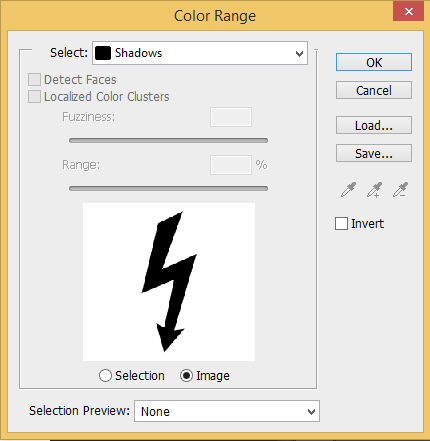
- Now, go to Select > Color Range and select Shadows.
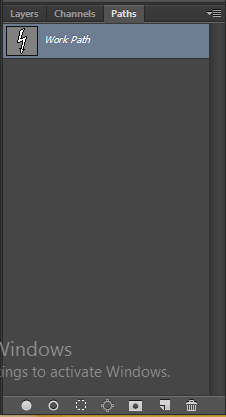
- With the selection active, navigate to the layers panel and click on “Paths” and click “create work path.”
- Under the layers panel click on Layers and create a new layer.
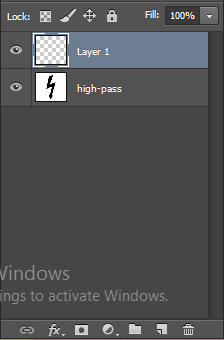
- With this new layer selected go to Layer > New Fill Layer > Solid Color and after naming the layer click OK.
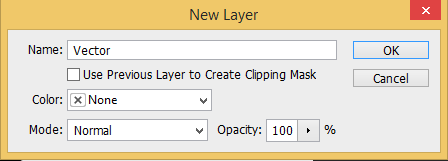
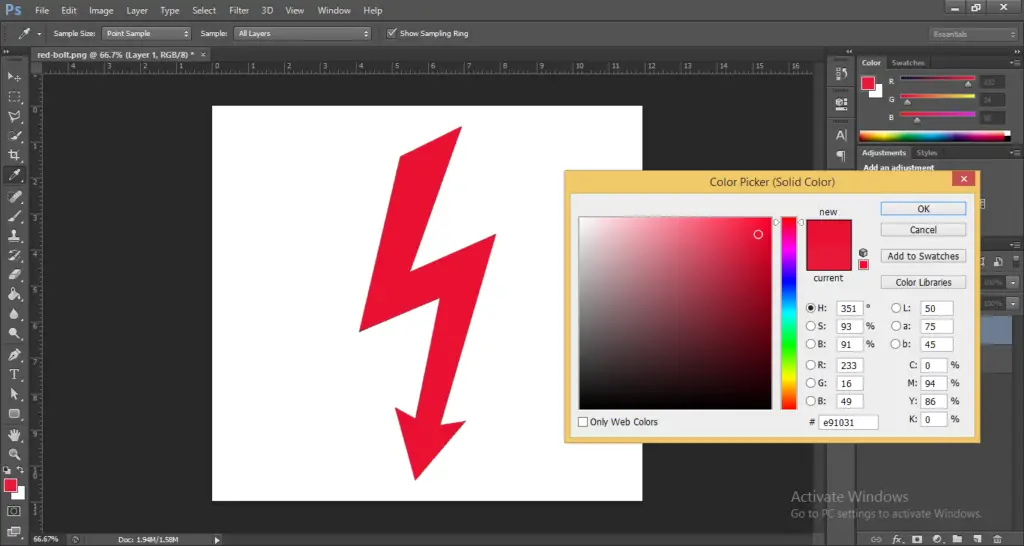
- After clicking OK you will be able to choose the color you want to fill in. Choose the color you like and then click OK.
- Finally, just hide or delete the base layer and keep the new layer active.

Congratulations! you just converted your raster image into a vector.
Exporting Your Image as a Vector Graphic
You might notice that if you zoom into your image you will still see it get pixelated, this is because Photoshop is a raster-based software so the image will always show pixelated when scaled up or down.
You need to export your image in a vector graphics format to be used. To do that go to File > Save As and choose any graphic format. Vector graphics are usually in the below formats:
- .SVG
- .AI (Paths to Adobe Illustrator)
- .EPS
- .WMF
- .CDR
Choose a format and then hit save.
The cool thing about this feature is that it can also work using BunnyPic. This saves you the trouble to open Photoshop and do this whole process. Since BunnyPic is a web-based online photo editor; free with no sign-up it’ll be much more convenient for converting images.
Try BunnyPic right now for Free!