
How to Resize Images in Photoshop The Right Way
Whether you’re a graphic designer, blogger or photographer there is one thing you need, images and not just any images but high-quality images.
You might be resizing images to optimize them for your website or maybe you’re a photographer that wants the image to be just the right size.
Resizing images the traditional way might cause them to pixelate, stretch or break which is why in this article we’ll discuss how to resize images in Photoshop, the right way.
Common Resizing Problems
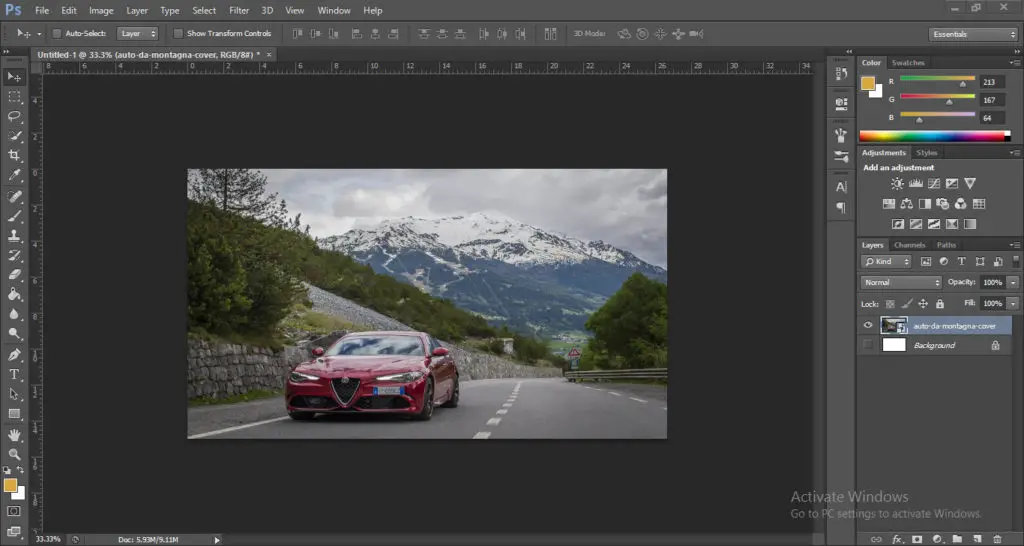
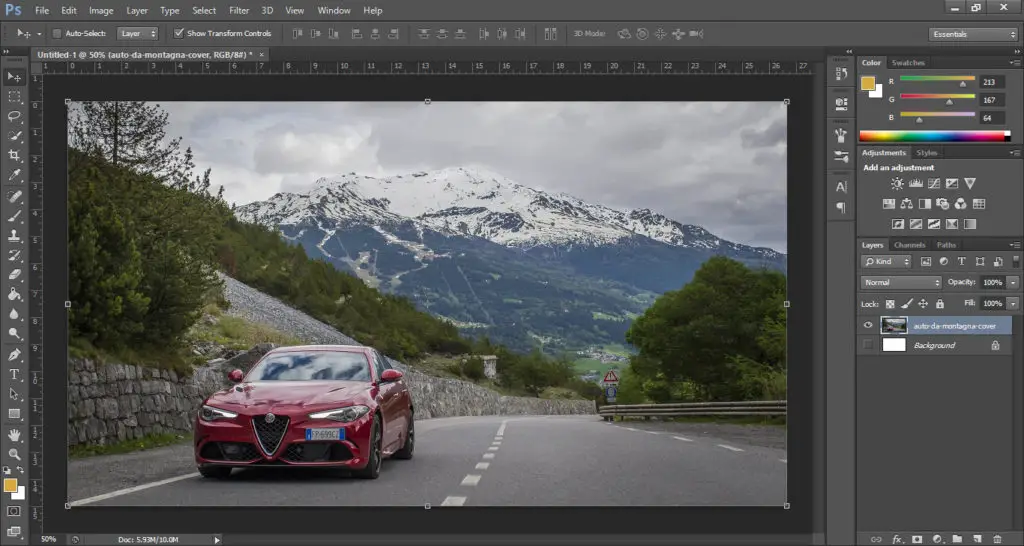
You found the perfect image for your project however after placing it in Photoshop you notice it doesn’t quite fit the size you want

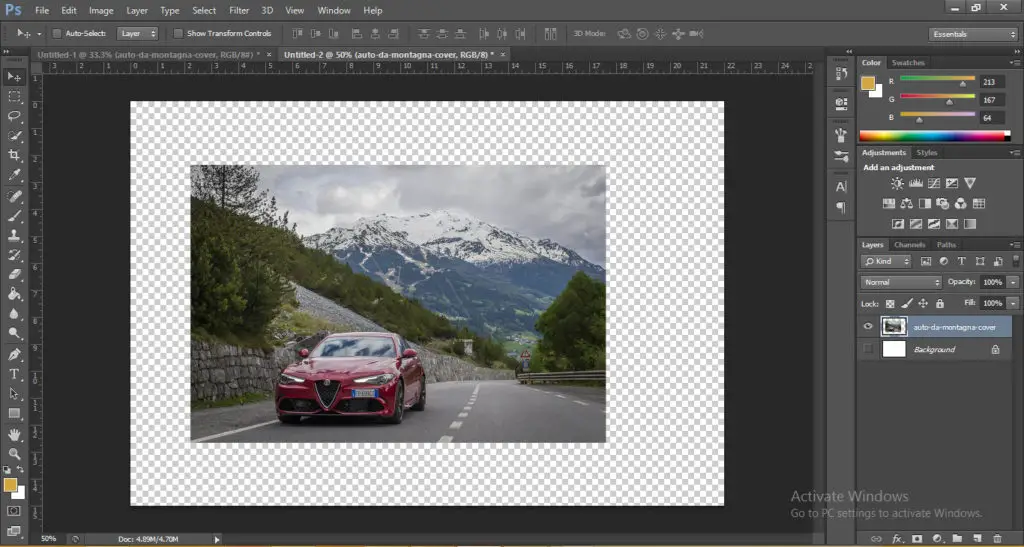
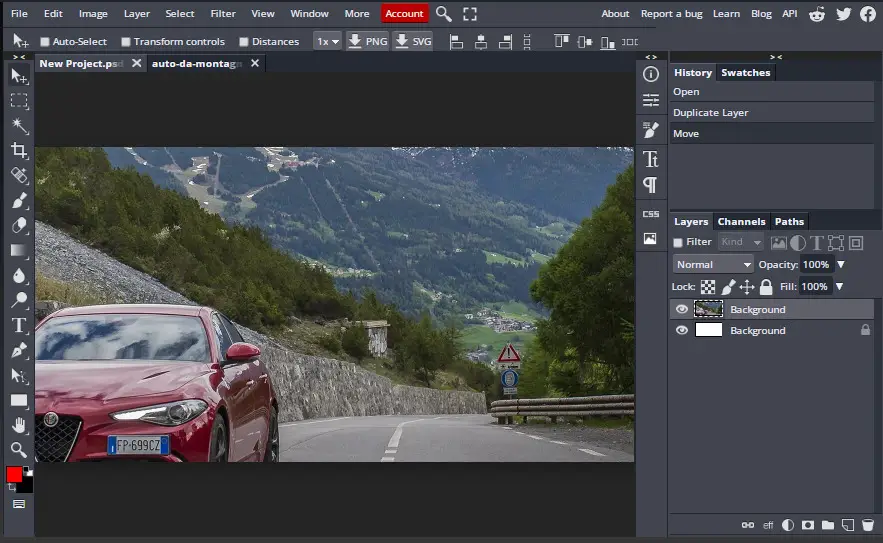
The most common way most beginners would try to resize their image is by Selecting the image > Transform Controls and then drag the image to fill up the transparent section.
However, the image stretches and gives you this result:
Let’s look at how to resize your image properly by fixing the above issue
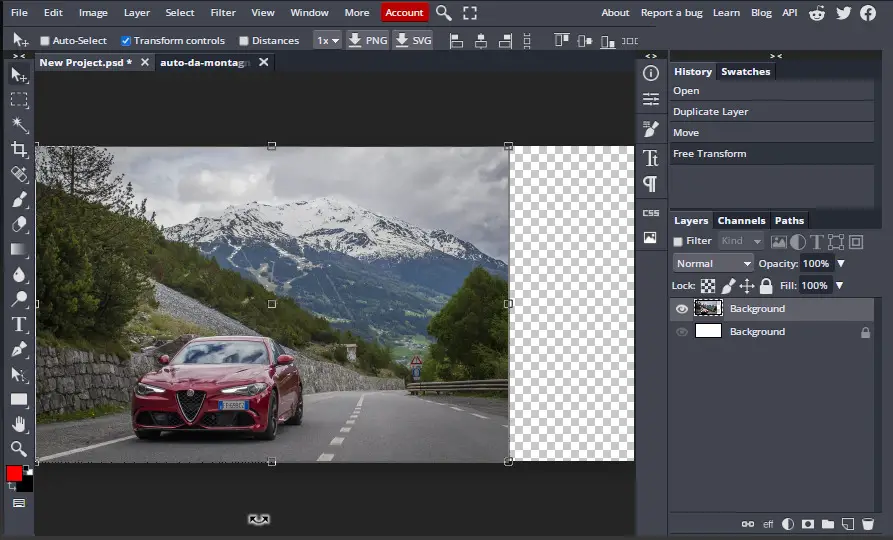
Resizing images while maintaining proportions
The easiest way to resize your images correctly is to use the transformation controls in Photoshop.
The below instructions work for both BunnyPic and Photoshop:
- Open a new project and place your image by going to File > Place and selecting your image.
- After placing the image, select it and click the Transformation Controls on the top bar.
- Scales will appear around your image, Hold Shift and drag your image to size it up. Holding shift while scaling will keep the proportions locked meaning your image won’t stretch or break.
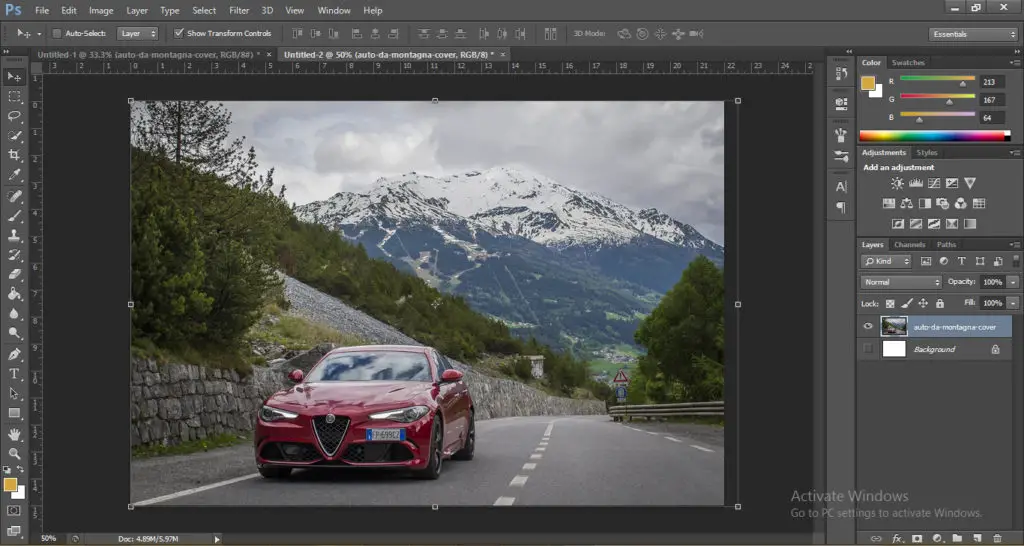
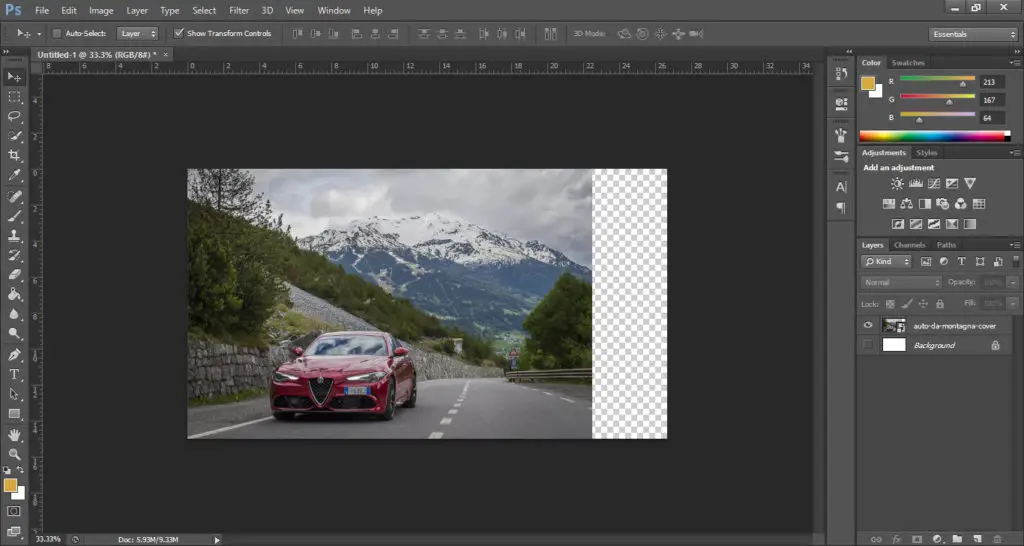
However, you’ll notice that it cuts some of the image to fit it into scale, to avoid this we can use the content-aware tool.
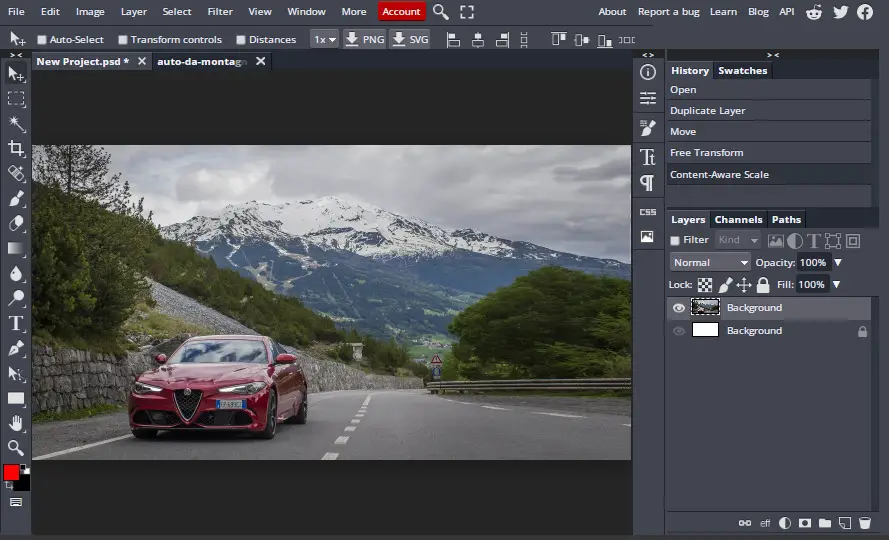
Resizing Images using the Content-Aware Scale
Photoshop has a great tool to preserve the quality and pixels of the image, it uses its A.I. to automatically detect pixels and preserve their quality in regards to scale.
To resize your images using the content-aware tool:
- Open a new project and place your image by going to File > Place and selecting your image.
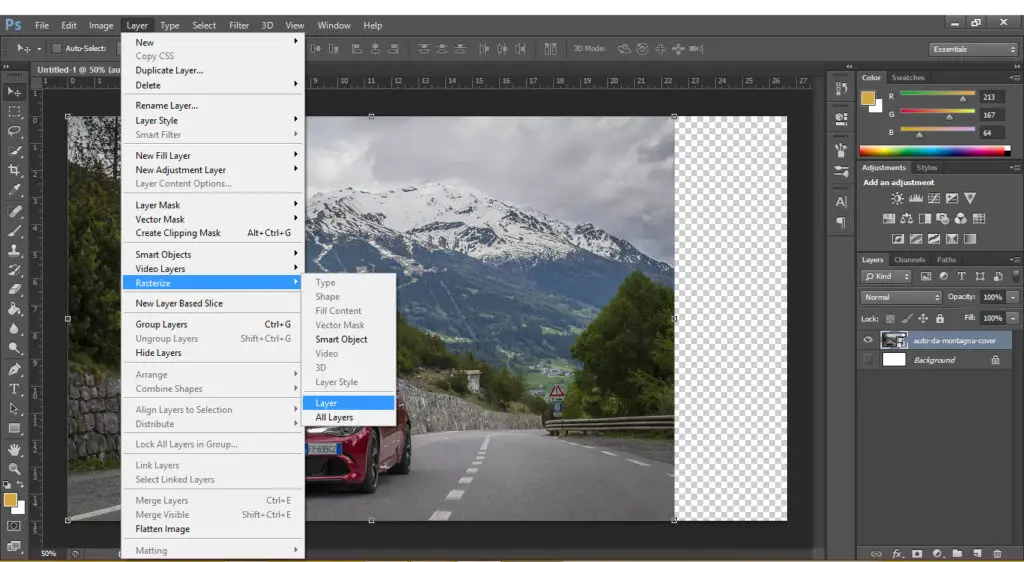
- The content-aware scale only works on raster images. To rasterize your image select the image layer and go to Layer > Rasterize > Layer (select all layers if you are rasterizing more than 1 image.)
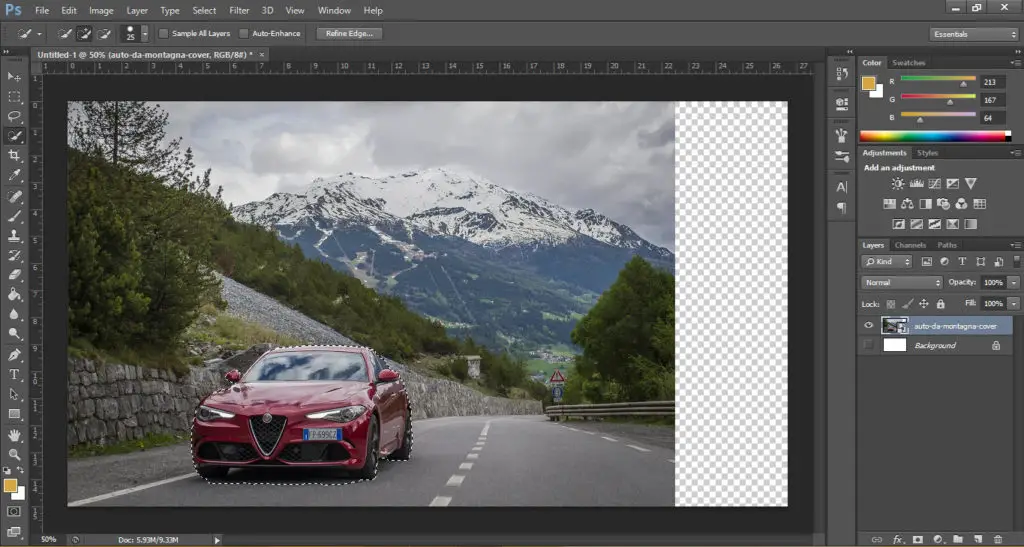
- Next, select the subject by using the Quick selection or Magic wand tools. The selection doesn’t have to be perfect as Photoshop will be able to detect parts of the subject itself.
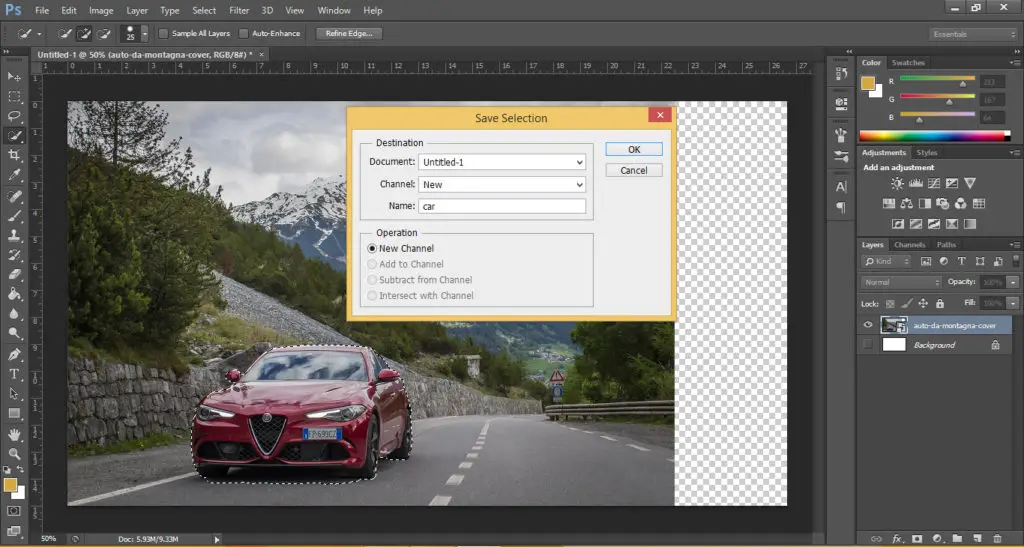
- With your subject selected, go to Select > Save Selection and a pop-up would appear to name your selection. In this example I’ll be naming my selection, “Car.”
- After saving the selection, on the top-left click on Edit > Content-Aware Tool. With the content-aware tool active, on the top click on the drop-down menu that says “protect” and select your selection.
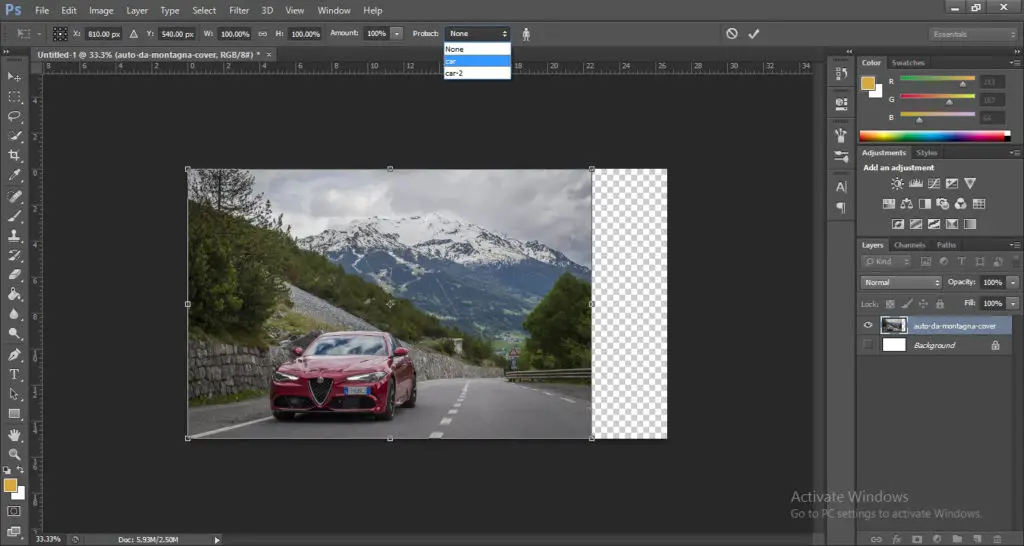
This will tell Photoshop to protect the subject from getting stretched regardless of the scale.
- Finally, after following all the steps, click and drag your image to fit into the screen.
As you can see it worked perfectly and Photoshop managed to preserve the scale of the background.
If you don’t have Photoshop, you can use our free-to-use online Photoshop editor, BunnyPic.
BunnyPic is a powerful online editor with tools similar to Photoshop that appeal to graphic designers, web designers, photographers, and bloggers.
If you plan on using BunnyPic to resize your images there are slight differences. Here’s how to resize your images using the content-aware tool in BunnyPic:
- Click New Project and open your image
- After opening your image drag it to your main project screen
- You’ll notice that your image may be too large or too small according to the size. To fix this click on Transform tcontrols, hold Shift while sizing your image to keep the proportions maintained.
- Now, select the image layer and go to Layer > Raster Mask > Add (Reveal All) this will rasterize your image.
- With your image selected go to Edit > Content-Aware Scale and drag your image to fit the size.
After following all the steps correctly you should end up with a perfectly scaled image.
Get started with BunnyPic!
it good to edit photo