
We take pictures to capture moments. We want a physical reminder of these moments because they are precious to us. They give us an emotional high. That is why in today’s world we mostly have pictures of every important event of our life. We used to make albums out of printed pictures and sort those pictures in some way so that they were easier for us to find. We would combine the photos that were related to a single event in an album. But how do we do it digitally?
The answer to this question is photo grids. We take photos that have a connection within them and make a grid out of them. As a result, we make a single image that has all of those images combined. You can take as many images as you want and make a grid out of them. BunnyPic is online software that lets you edit and modify according to your own preference. It is a handy way to make, create and jot down your ideas in one frame.
Why use BunnyPic?
We can edit and apply unique touch-ups to boring photos and turn them into something more attractive. This all-in-one editing platform enables users to access the dashboard, where a collection of tools is put out nicely. Users may start working on a new project or continue using an existing picture file accessible on their PC.
Today is the time where social sites are the main handle. Be it the formal poster, invites, or informally posting photos with your friends. It’s another job to make and design unique posts etc.
The innovative and straightforward interface makes BunnyPic easy to comprehend and easy to work with. The newest version of the program includes helpful tools, including the Puppet Warp tool, Normal Map filter, and Oil Paint filter. The Puppet Warp functionality helps bend things.
What is a Photo Grid?
Photo Grids are used to jot down many ideas in one. With Bunnypic you can make a grid photo in less than 5 minutes. You can use grids to make photo collages, mood boards, as well as eye-catching posters. Curate crisp designs with the Adobe Spark Post grid maker, use a combination of stock photos as well as your own uploaded images. The amount of customization available allows you to create genuinely unique grids without having to start from scratch.
Steps to Make a Grid of Photos Online:
To make a grid of photos online on Bunnypic you need to follow the following steps to make the task easier.
Think about an inspiration
Before you start, roughly think about the ideas. Make up a theme in your mind or start with an inspiration. There are hundreds of templates you might find on Bunnypic. Bring up a theme and act accordingly. Search the template according to your inspiration, be it aesthetic, colorful, or playful. Once you find the graphic according to what you have in your mind, open it and start editing. Pre-deciding about what you want or have a clear idea in your mind will make you select the design quickly. The maximum time to select a design would only take around 60 seconds.
Recreate to make it yours
There are many ways you can change or use an already designed template and create your own personalized idea. You can change the colors and add your own patterns to make it unique. This will give a personal touch to your grid. As it is a grid of your memories, so it needs to be personal.
Sort out the images
Before you start editing photos, sort out your images beforehand to save time. Select or bring up the images you want to add in your recent. Choose maximum images you want to put up in the grid. The images can be added in both landscape and portrait layouts.
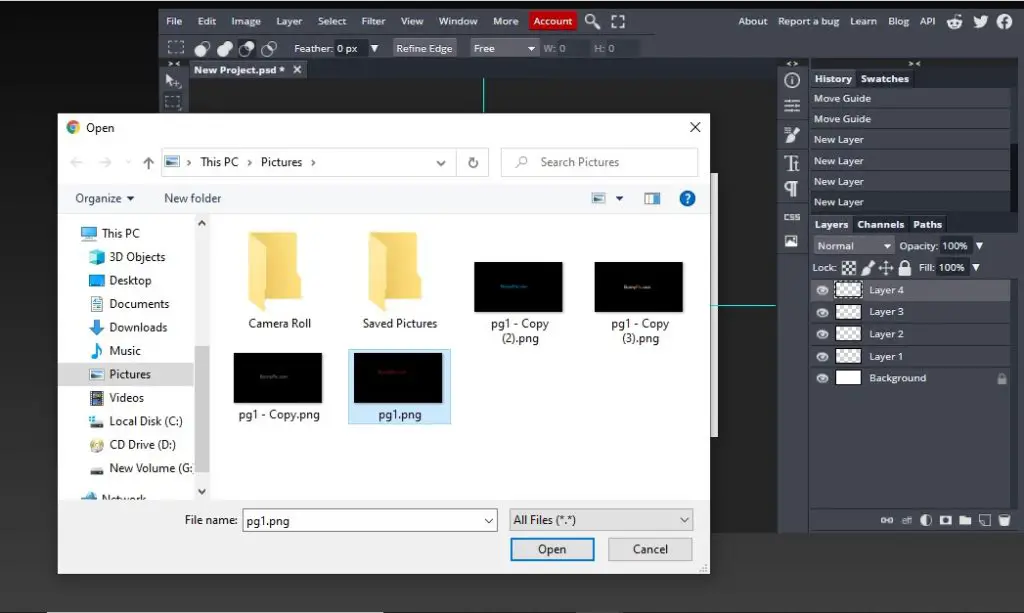
Create a poster and open images
In Bunnypic choose File > New. From the Preset dropdown box, choose International Paper and from the Size dialog box, choose A4. We want to create a poster for printing that leaves the Resolution at 300 pixels. Click OK.
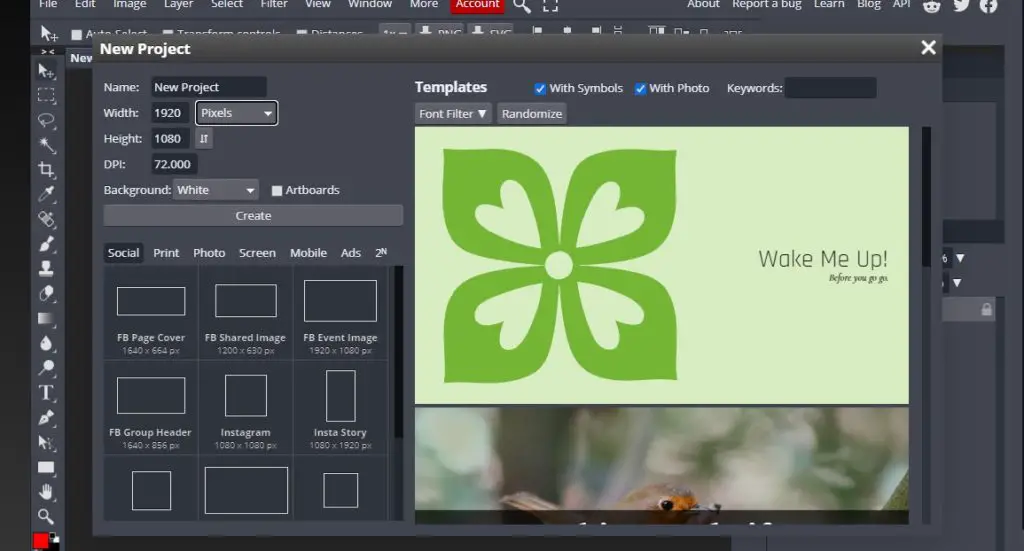
However, you can choose the size that fits your needs. Now, open all the images you previously selected. Even if the photos are of low quality and don’t have those perfect angels, it doesn’t matter. Putting them in a grid will make them look good.
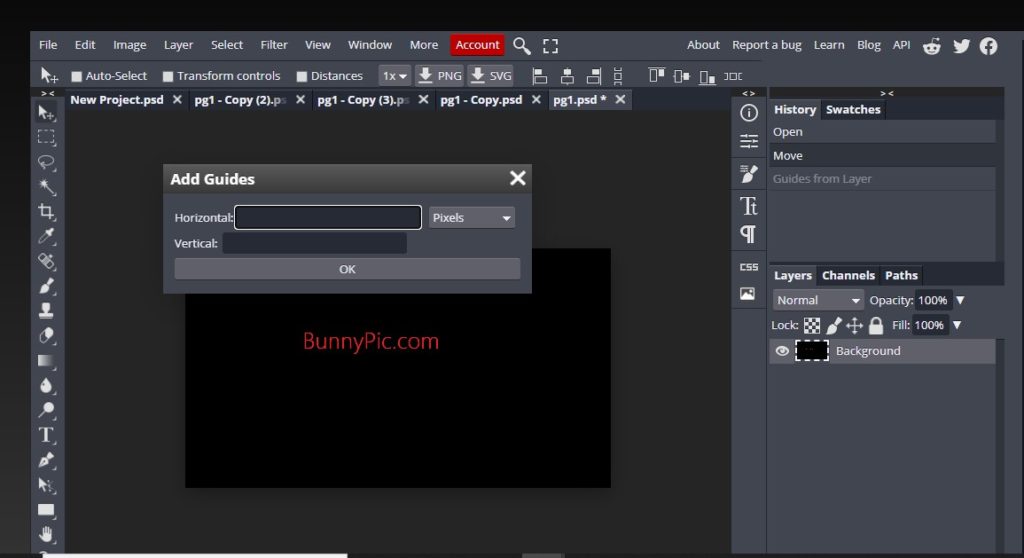
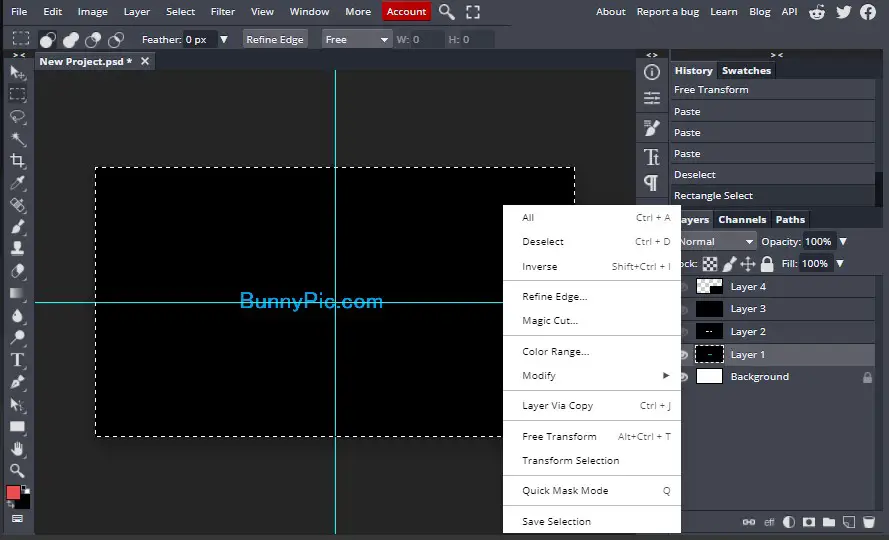
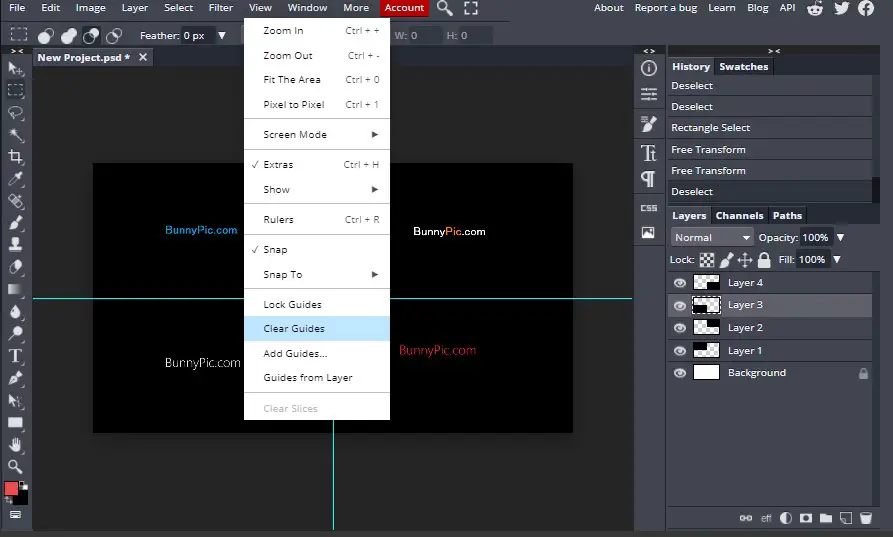
Select a New Guide Layout
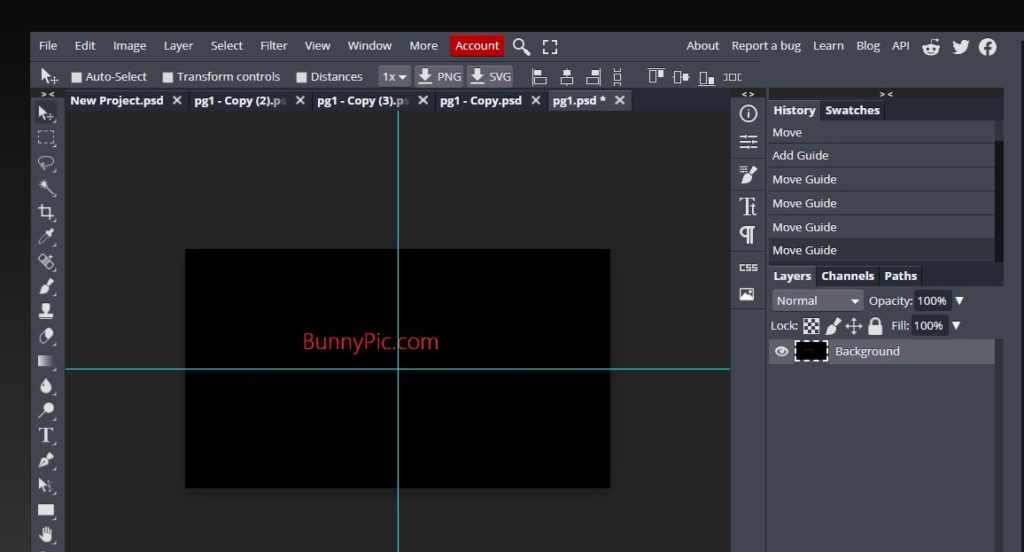
Next, you have to go to the View tab and select New Guide Layout. You can add guides in accordance with your grid. Here we are making a grid of four pictures so we will only add 1 guide, horizontally and vertically.
After adding the guides, you will move them in an orientation that corresponds to the grid you want to make.
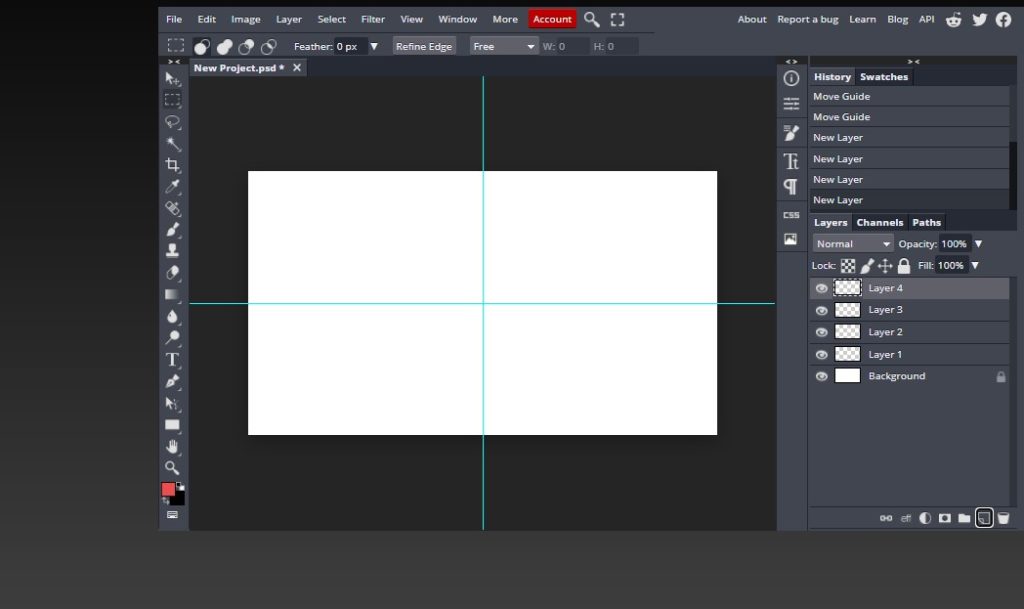
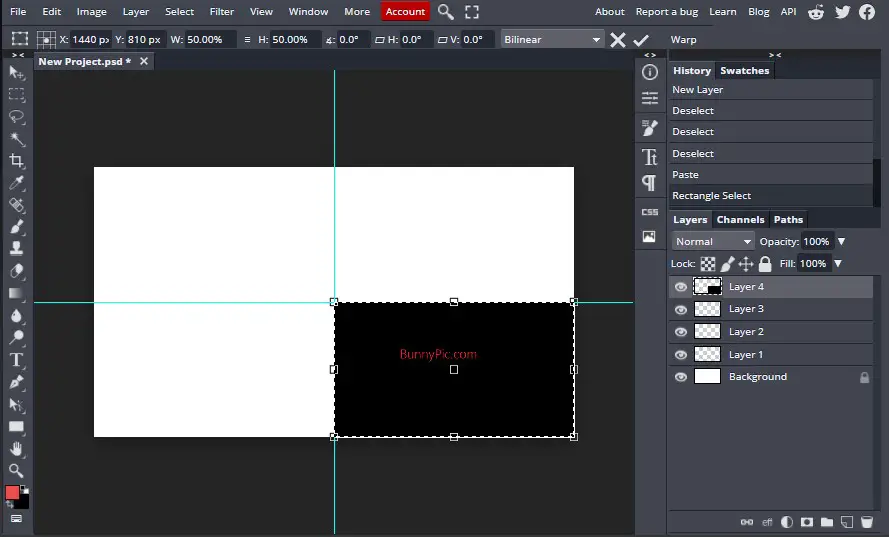
Add Layers
Now you have to add a new layer to your project. The button for a new layer is present at the bottom right of the screen. You need the same amount of layers as the photos.
Crop the images
Crop or resize the images. Select the images, their platforms, and then resize them so they fit perfectly wherever you wish to place them. You need to do this step beforehand so that it’s easier when you are crafting the grid.
Paste and Transform the Images
Select images and paste them on the grid one by one. You can use the Rectangular Marquee tool (M) to select in each of your photographs. When you’ve selected the Rectangular Marquee tool, hold down the Shift key and drag out a perfectly square selection of the part of the image that you want to appear on your poster.
Click on the image and you can move and drag the photos to the desired place. By dragging your images, you can also change and adjust the area of your images according to the pattern you have in your mind.
This entire process is totally based on your creativity. If the idea is clear in your mind, then dragging and adjusting can be done in a couple of minutes.
Remove the Grid
Once you’ve placed all of your images in the perfect order, remove the background graph on the grid.
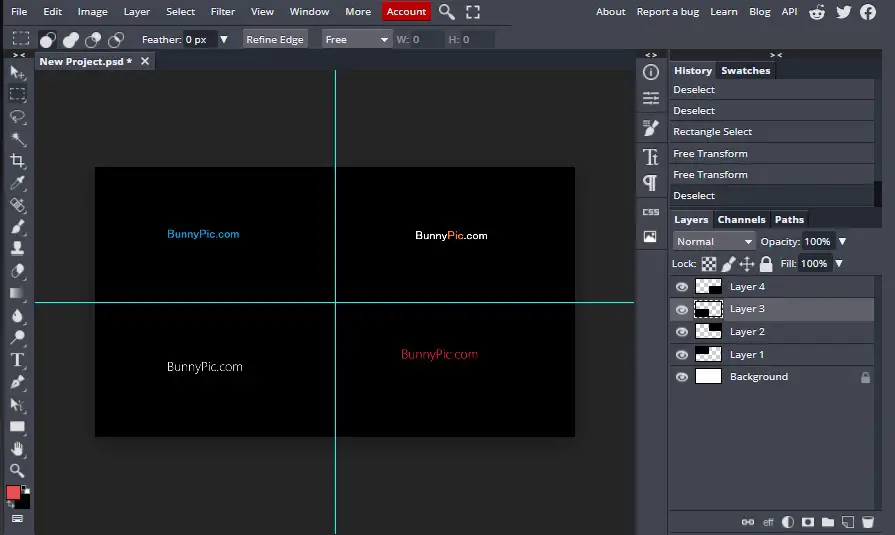
At this point, you can change the color, texture, or design. You can use the previously selected template design or even keep it mainstream if you want to make it simple and aligned. You can keep the images smaller and add a background or colors to them. This is entirely up to your preference.
Add the texts
After you have done adjusting the images. This step is optional. You can add texts at the bottom or anywhere on the images. If it is a commercial grid, you need to add details here. Moreover, if the grid is from an event or a memory or showing a time-lapse you can add dates, times, and years to make it more interesting and fun to look at.
Now, here’s a small time-saving tip. Since you’ve already used Free Transform to scale the first photo, you can now take advantage of “Transform Again.” Just press Shift + Ctrl + T (Windows) or Shift + CMD + T (Mac) and the same resizing that was applied to the previous photo will be applied to this one.
Final Edits
In the end, you can add filters or colors to the images. Use different sliders such as blue, red, and green, etc. to change the look of the images. You can turn them black and white too. Moreover, at this point, you can also add stickers.
This is completely how you want to do it. This guide tells you the path you have to walk.
how you walk, is up to you.
Final Words:
This process is a quick process when using Bunnypic and if done correctly, it can be completed in approximately five minutes. Editing images has been made easy from this kind of software. This platform is new and advanced where you can complete your task quickly and save time. It offers to assist you and will keep giving you suggestions that’ll help you make your decisions and complete your editing with more efficiency.